Boss Encounters: Difference between revisions
Jump to navigation
Jump to search
Created Boss Encounters & Champion Spawns guide with authentic images |
Created Boss Encounters & Champion Spawns guide with authentic images (Fixed HTML and nav) |
||
| Line 1: | Line 1: | ||
<div class="uor-main-hero" style="background: linear-gradient(135deg, rgba(28, 22, 14, 0.95), rgba(10, 8, 5, 0.98)); border: 1px solid #d4af37; border-radius: 8px; padding: 22px; margin-bottom: 24px; box-shadow: 0 4px 20px rgba(0, 0, 0, 0.7); display: flex; flex-wrap: wrap; gap: 20px; align-items: center;"> | <html><div class="uor-main-hero" style="background: linear-gradient(135deg, rgba(28, 22, 14, 0.95), rgba(10, 8, 5, 0.98)); border: 1px solid #d4af37; border-radius: 8px; padding: 22px; margin-bottom: 24px; box-shadow: 0 4px 20px rgba(0, 0, 0, 0.7); display: flex; flex-wrap: wrap; gap: 20px; align-items: center;"> | ||
<div style="flex: 1 1 500px;"> | <div style="flex: 1 1 500px;"> | ||
<div style="font-family: 'Cinzel Decorative', serif; font-size: 1.85rem; color: #ffd700; text-shadow: 0 2px 8px rgba(0,0,0,0.8); margin-bottom: 6px;">Boss Encounters & Champion Spawns</div> | <div style="font-family: 'Cinzel Decorative', serif; font-size: 1.85rem; color: #ffd700; text-shadow: 0 2px 8px rgba(0,0,0,0.8); margin-bottom: 6px;">Boss Encounters & Champion Spawns</div> | ||
<div style="font-family: 'Cardo', serif; font-size: 1.1rem; color: #e6dfd1; font-style: italic; line-height: 1.5;">Face the most terrifying apex legends of Britannia: Ancient Wyrms, Balrons, Lich Lords, the 6 Champion Spawns, and the Harrower.</div> | <div style="font-family: 'Cardo', serif; font-size: 1.1rem; color: #e6dfd1; font-style: italic; line-height: 1.5;">Face the most terrifying apex legends of Britannia: Ancient Wyrms, Balrons, Lich Lords, the 6 Champion Spawns, and the Harrower.</div> | ||
</div> | </div></html> | ||
<div style="flex: 0 0 auto; text-align: center;"> | <div style="flex: 0 0 auto; text-align: center;"> | ||
<img src="/wiki/images/champions/Harrower_Full.png" alt="Boss Encounters" style="border: 2px solid #d4af37; border-radius: 6px; box-shadow: 0 2px 10px rgba(0,0,0,0.6); max-height: 80px;" /> | <html><img src="/wiki/images/champions/Harrower_Full.png" alt="Boss Encounters" style="border: 2px solid #d4af37; border-radius: 6px; box-shadow: 0 2px 10px rgba(0,0,0,0.6); max-height: 80px;" /></html> | ||
</div> | </div> | ||
</div> | </div> | ||
<html> | |||
<div class="uor-section-nav" style="background: rgba(22, 17, 11, 0.85); border: 1px solid rgba(212, 175, 55, 0.45); border-left: 5px solid #d4af37; padding: 14px 18px; border-radius: 6px; margin-bottom: 24px; display: flex; flex-wrap: wrap; gap: 12px; align-items: center; justify-content: space-between;"> | <div class="uor-section-nav" style="background: rgba(22, 17, 11, 0.85); border: 1px solid rgba(212, 175, 55, 0.45); border-left: 5px solid #d4af37; padding: 14px 18px; border-radius: 6px; margin-bottom: 24px; display: flex; flex-wrap: wrap; gap: 12px; align-items: center; justify-content: space-between;"> | ||
<div style="display: flex; align-items: center; gap: 10px;"> | |||
<span style="font-family: 'Cinzel Decorative', serif; font-weight: bold; color: #ffdf6a; font-size: 0.95rem;">Jump to Section:</span> | |||
<select onchange="if (this.value) { var el = document.getElementById(this.value); if (el) { el.scrollIntoView({behavior: 'smooth', block: 'start'}); } }" style="background: #101622; color: #e6dfd1; border: 1px solid #d4af37; padding: 5px 10px; border-radius: 4px; font-family: 'Cardo', serif; font-size: 0.95rem; cursor: pointer;"> | |||
<option value="">-- Select Encounter Topic --</option> | |||
<option value="apex">Apex World Monsters (Balron, Ancient Wyrm)</option> | |||
<option value="champs">Champion Spawns & Candles</option> | |||
<option value="bosses">The 6 Champion Bosses</option> | |||
<option value="harrower">The True Harrower & Super Champion</option> | |||
<option value="tactics">Tactics, Slayers & Survival</option> | |||
</select> | |||
</div> | |||
<div style="display: flex; gap: 8px; flex-wrap: wrap;"> | |||
<a href="#apex" class="uor-pill" style="background: rgba(212,175,55,0.15); border: 1px solid #d4af37; color: #ffdf6a; padding: 4px 10px; border-radius: 20px; text-decoration: none; font-size: 0.82rem; font-weight: bold;">Apex Monsters</a> | |||
<a href="#champs" class="uor-pill" style="background: rgba(212,175,55,0.15); border: 1px solid #d4af37; color: #ffdf6a; padding: 4px 10px; border-radius: 20px; text-decoration: none; font-size: 0.82rem; font-weight: bold;">Champion Spawns</a> | |||
<a href="#bosses" class="uor-pill" style="background: rgba(212,175,55,0.15); border: 1px solid #d4af37; color: #ffdf6a; padding: 4px 10px; border-radius: 20px; text-decoration: none; font-size: 0.82rem; font-weight: bold;">Bosses</a> | |||
<a href="#harrower" class="uor-pill" style="background: rgba(212,175,55,0.15); border: 1px solid #d4af37; color: #ffdf6a; padding: 4px 10px; border-radius: 20px; text-decoration: none; font-size: 0.82rem; font-weight: bold;">The Harrower</a> | |||
</div> | |||
</div> | </div> | ||
</html> | |||
<span id="apex"></span> | <span id="apex"></span> | ||
| Line 36: | Line 38: | ||
<div style="background: rgba(28, 22, 14, 0.85); border: 1px solid rgba(212, 175, 55, 0.4); border-radius: 8px; padding: 14px; text-align: center;"> | <div style="background: rgba(28, 22, 14, 0.85); border: 1px solid rgba(212, 175, 55, 0.4); border-radius: 8px; padding: 14px; text-align: center;"> | ||
<img src="/wiki/images/bestiary/Balron_100.png" alt="Balron" style="margin-bottom: 8px; border-radius: 4px;" /> | <html><img src="/wiki/images/bestiary/Balron_100.png" alt="Balron" style="margin-bottom: 8px; border-radius: 4px;" /></html> | ||
<div style="font-family: 'Cinzel Decorative', serif; font-size: 1.1rem; color: #ffd700;">Balron</div> | <div style="font-family: 'Cinzel Decorative', serif; font-size: 1.1rem; color: #ffd700;">Balron</div> | ||
<div style="font-size: 0.85rem; color: #c0b299; margin: 4px 0;">Hythloth L4 • Terathan Keep</div> | <div style="font-size: 0.85rem; color: #c0b299; margin: 4px 0;">Hythloth L4 • Terathan Keep</div> | ||
| Line 43: | Line 45: | ||
<div style="background: rgba(28, 22, 14, 0.85); border: 1px solid rgba(212, 175, 55, 0.4); border-radius: 8px; padding: 14px; text-align: center;"> | <div style="background: rgba(28, 22, 14, 0.85); border: 1px solid rgba(212, 175, 55, 0.4); border-radius: 8px; padding: 14px; text-align: center;"> | ||
<img src="/wiki/images/bestiary/AncientWyrm_100.png" alt="Ancient Wyrm" style="margin-bottom: 8px; border-radius: 4px;" /> | <html><img src="/wiki/images/bestiary/AncientWyrm_100.png" alt="Ancient Wyrm" style="margin-bottom: 8px; border-radius: 4px;" /></html> | ||
<div style="font-family: 'Cinzel Decorative', serif; font-size: 1.1rem; color: #ffd700;">Ancient Wyrm</div> | <div style="font-family: 'Cinzel Decorative', serif; font-size: 1.1rem; color: #ffd700;">Ancient Wyrm</div> | ||
<div style="font-size: 0.85rem; color: #c0b299; margin: 4px 0;">Destard L2</div> | <div style="font-size: 0.85rem; color: #c0b299; margin: 4px 0;">Destard L2</div> | ||
| Line 50: | Line 52: | ||
<div style="background: rgba(28, 22, 14, 0.85); border: 1px solid rgba(212, 175, 55, 0.4); border-radius: 8px; padding: 14px; text-align: center;"> | <div style="background: rgba(28, 22, 14, 0.85); border: 1px solid rgba(212, 175, 55, 0.4); border-radius: 8px; padding: 14px; text-align: center;"> | ||
<img src="/wiki/images/bestiary/AncientLich_100.png" alt="Ancient Lich" style="margin-bottom: 8px; border-radius: 4px;" /> | <html><img src="/wiki/images/bestiary/AncientLich_100.png" alt="Ancient Lich" style="margin-bottom: 8px; border-radius: 4px;" /></html> | ||
<div style="font-family: 'Cinzel Decorative', serif; font-size: 1.1rem; color: #ffd700;">Ancient Lich</div> | <div style="font-family: 'Cinzel Decorative', serif; font-size: 1.1rem; color: #ffd700;">Ancient Lich</div> | ||
<div style="font-size: 0.85rem; color: #c0b299; margin: 4px 0;">Deceit L4 • Khaldun</div> | <div style="font-size: 0.85rem; color: #c0b299; margin: 4px 0;">Deceit L4 • Khaldun</div> | ||
| Line 57: | Line 59: | ||
<div style="background: rgba(28, 22, 14, 0.85); border: 1px solid rgba(212, 175, 55, 0.4); border-radius: 8px; padding: 14px; text-align: center;"> | <div style="background: rgba(28, 22, 14, 0.85); border: 1px solid rgba(212, 175, 55, 0.4); border-radius: 8px; padding: 14px; text-align: center;"> | ||
<img src="/wiki/images/bestiary/Kraken_100.png" alt="Kraken" style="margin-bottom: 8px; border-radius: 4px;" /> | <html><img src="/wiki/images/bestiary/Kraken_100.png" alt="Kraken" style="margin-bottom: 8px; border-radius: 4px;" /></html> | ||
<div style="font-family: 'Cinzel Decorative', serif; font-size: 1.1rem; color: #ffd700;">Kraken & Deep Sea Serpent</div> | <div style="font-family: 'Cinzel Decorative', serif; font-size: 1.1rem; color: #ffd700;">Kraken & Deep Sea Serpent</div> | ||
<div style="font-size: 0.85rem; color: #c0b299; margin: 4px 0;">High Seas • MiB Coordinates</div> | <div style="font-size: 0.85rem; color: #c0b299; margin: 4px 0;">High Seas • MiB Coordinates</div> | ||
Latest revision as of 01:14, 9 September 2026
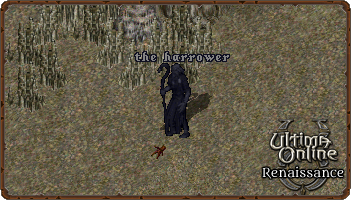
Boss Encounters & Champion Spawns
Face the most terrifying apex legends of Britannia: Ancient Wyrms, Balrons, Lich Lords, the 6 Champion Spawns, and the Harrower.
Jump to Section:
Apex World Monsters
Britannia is terrorized by solitary apex monsters that lurk in the deepest dungeon vaults:
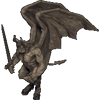
Balron
Hythloth L4 • Terathan Keep
Possesses monstrous strength (1000 HP), casts 8th circle magery instantly, and hits with crushing melee. Vulnerable to **Exorcism (Demon Slayer)**.
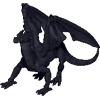
Ancient Wyrm
Destard L2
The king of dragonkind. Breathes cataclysmic fireballs based on full HP, casts deadly curses, and has enormous spell resistance. Requires **Dragon Slayer**.
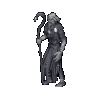
Ancient Lich
Deceit L4 • Khaldun
Deadly undead sorcerer with lethal poison, devastating mana drain, and chained Flamestrike combos. Weak against **Silver (Undead Slayer)**.

Kraken & Deep Sea Serpent
High Seas • MiB Coordinates
Beasts of the watery deep that drag ships down into the abyss. Slayable with high-damage archers and provokers on open water.
Champion Spawns & Progression
Champion Spawns are dynamic public events where players battle escalating waves of monsters to summon a legendary Champion Boss:
- The Altar: Each spawn centers on an altar topped with a central pentagram and candle perimeter.
- Candle Progression: Killing monsters spawns red candles (level progression) and white candles (progress within the level). There are 16 red candles total across 4 distinct monster tiers.
- Spawn Restarts: If monsters are not killed quickly enough, candles extinguish and the spawn degrades.
The 6 Champion Bosses
| Boss | Champion Spawn | Location | Vulnerability | Special Threat |
|---|---|---|---|---|
| File:Barracoon Icon.png Barracoon the Piper | Vermin Horde | Despise L3 / Lost Lands | Repond / Vermin | Polymorphs attackers into rats, summons giant rat swarms |
| File:Neira Icon.png Neira the Necromancer | Unholy Terror | Deceit L4 / Lost Lands | Silver (Undead) | Dismounts riders, throws explosive undead bones, casts necromancy |
| File:Rikktor Icon.png Rikktor | Cold Blood | Destard L1 / Lost Lands | Reptile Slayer | Earthquake ground pound (deals 50%+ max HP to all nearby) |
| File:Mephitis Icon.png Mephitis | Arachnid | Terathan Keep / Lost Lands | Arachnid Slayer | Web cocoon immobilize, lethal poison spit, spider summons |
| File:Semidar icon.png Semidar | Abyss | Fire Dungeon / Lost Lands | Exorcism (Demon) | Reflects male melee damage, lethal fire explosions |
| File:LordOaks Icon.png Lord Oaks & Silvani | Forest Lord | Lost Lands Glade | Fey | Immune to damage until Silvani the Unicorn is defeated |


The True Harrower
Defeating any Champion Boss awards a **Champion Skull**. Once all 6 unique skulls are gathered and placed upon the Star Room altar, the **True Harrower** awakens in a random dungeon:
- The Harrower is a colossal multi-tentacled nightmare that casts global life drain and summons devastating tentacles.
- Slaying the Harrower and its tentacles awards massive gold, rare artifacts, and championship titles.
Tactics & Survival
- Slayer Synergy: Always bring matched slayer weapons or spellbooks. Slayers deliver 2x damage against targeted monster families.
- PvP Preparedness: Champion spawns alert the entire shard. Murderers and anti-guilds frequently raid the altar during Tier 4 or boss fights. Maintain high stamina, keep teleport/invisibility potions ready, and coordinate with guildmates.