The Zookeeper's Quest: Difference between revisions
Publish The Zookeeper's Quest |
Make images bigger and fix nav buttons on The Zookeeper's Quest |
||
| Line 1: | Line 1: | ||
__NOTOC__ | __NOTOC__ | ||
<div class="uor-main-hero" style="background: linear-gradient(135deg, rgba(28, 22, 14, 0.95), rgba(10, 8, 5, 0.98)); border: 1px solid #d4af37; border-radius: 8px; padding: 24px; margin-bottom: 24px; box-shadow: 0 4px 20px rgba(0, 0, 0, 0.7); text-align: center;"> | <div class="uor-main-hero" style="background: linear-gradient(135deg, rgba(28, 22, 14, 0.95), rgba(10, 8, 5, 0.98)); border: 1px solid #d4af37; border-radius: 8px; padding: 24px; margin-bottom: 24px; box-shadow: 0 4px 20px rgba(0, 0, 0, 0.7); text-align: center;"> | ||
<div style="font-family: 'Cinzel Decorative', serif; font-size: | <div style="font-family: 'Cinzel Decorative', serif; font-size: 2.1rem; color: #ffd700; text-shadow: 0 2px 8px rgba(0,0,0,0.8); margin-bottom: 8px;">The Zookeeper's Quest</div> | ||
<div style="font-family: 'Cardo', serif; font-size: 1.15rem; color: #e6dfd1; max-width: 800px; margin: 0 auto; font-style: italic; line-height: 1.5;">The Whole Bloody Affair — Complete Walkthrough, FAQ, Rare Animal Directory & Boss Strategy</div> | <div style="font-family: 'Cardo', serif; font-size: 1.15rem; color: #e6dfd1; max-width: 800px; margin: 0 auto; font-style: italic; line-height: 1.5;">The Whole Bloody Affair — Complete Walkthrough, FAQ, Rare Animal Directory & Boss Strategy</div> | ||
</div> | </div> | ||
<html> | |||
<div style="display: flex; flex-wrap: wrap; gap: 10px; justify-content: center; margin: 0 0 24px 0;"> | <div style="display: flex; flex-wrap: wrap; gap: 10px; justify-content: center; margin: 0 0 24px 0;"> | ||
<a href="#Part_1:_Quest_Walkthrough" class="uor-nav-btn" style="background: rgba(212, 175, 55, 0. | <a href="#Part_1:_Quest_Walkthrough" class="uor-nav-btn" style="background: rgba(212, 175, 55, 0.18); border: 1px solid #d4af37; color: #ffd700; padding: 8px 16px; border-radius: 6px; text-decoration: none; font-weight: bold; font-family: 'Cinzel', serif;">Part 1: Quest Walkthrough</a> | ||
<a href="#Part_2:_Bonding_Expansion_FAQ" class="uor-nav-btn" style="background: rgba(212, 175, 55, 0. | <a href="#Part_2:_Bonding_Expansion_FAQ" class="uor-nav-btn" style="background: rgba(212, 175, 55, 0.18); border: 1px solid #d4af37; color: #ffd700; padding: 8px 16px; border-radius: 6px; text-decoration: none; font-weight: bold; font-family: 'Cinzel', serif;">Part 2: Bonding FAQ</a> | ||
<a href="#Part_3:_Required_Rare_Animals" class="uor-nav-btn" style="background: rgba(212, 175, 55, 0. | <a href="#Part_3:_Required_Rare_Animals" class="uor-nav-btn" style="background: rgba(212, 175, 55, 0.18); border: 1px solid #d4af37; color: #ffd700; padding: 8px 16px; border-radius: 6px; text-decoration: none; font-weight: bold; font-family: 'Cinzel', serif;">Part 3: Rare Animals List</a> | ||
<a href="#Part_4:_Strategy_for_completing_the_quest" class="uor-nav-btn" style="background: rgba(212, 175, 55, 0. | <a href="#Part_4:_Strategy_for_completing_the_quest" class="uor-nav-btn" style="background: rgba(212, 175, 55, 0.18); border: 1px solid #d4af37; color: #ffd700; padding: 8px 16px; border-radius: 6px; text-decoration: none; font-weight: bold; font-family: 'Cinzel', serif;">Part 4: Boss Strategy & Rewards</a> | ||
</div> | </div> | ||
</html> | |||
<span id="Part_1:_Quest_Walkthrough"></span> | <span id="Part_1:_Quest_Walkthrough"></span> | ||
== Part 1: Quest Walkthrough == | == Part 1: Quest Walkthrough == | ||
<div style="background: rgba(22, 17, 11, 0.65); border: 1px solid rgba(212, 175, 55, 0.35); border-radius: 8px; padding: | <div style="background: rgba(22, 17, 11, 0.65); border: 1px solid rgba(212, 175, 55, 0.35); border-radius: 8px; padding: 22px 26px; margin: 16px 0 24px 0; box-shadow: 0 4px 16px rgba(0,0,0,0.5); font-size: 1.05rem; line-height: 1.7;"> | ||
<div style="color: #c8b99d; font-style: italic; margin-bottom: | <div style="color: #c8b99d; font-style: italic; margin-bottom: 16px; font-size: 1rem;">This guide has been put together with information from Chris & Dalavar</div> | ||
From patch 52, players will be able to attempt the Zookeepers Quest in order to earn additional bonded pets. | From patch 52, players will be able to attempt the Zookeepers Quest in order to earn additional bonded pets. | ||
<br/><br/> | <br/><br/> | ||
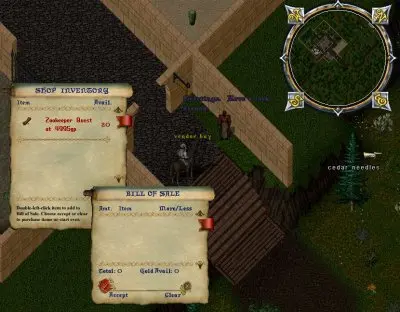
To begin the quest, players should seek out the Moonglow Zookeeper. He wants to expand the variety of monsters in the zoo. To help him find new animals, you can buy his list of needed pets for 4,995 gold. | To begin the quest, players should seek out the Moonglow Zookeeper. He wants to expand the variety of monsters in the zoo. To help him find new animals, you can buy his list of needed pets for 4,995 gold. | ||
<html><div style="margin: | <html><div style="margin: 14px 0 22px 0;"><a href="/wiki/images/zookeeper/2323.webp" target="_blank"><img src="/wiki/images/zookeeper/2323.webp" alt="Moonglow Zookeeper purchasing scroll" style="width: 100%; max-width: 520px; border: 2px solid rgba(212, 175, 55, 0.55); border-radius: 6px; box-shadow: 0 6px 18px rgba(0,0,0,0.7); display: block; transition: transform 0.2s;" /></a></div></html> | ||
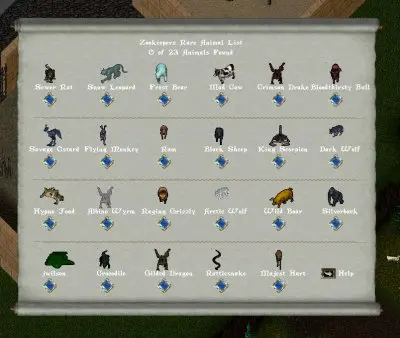
To see your progress towards finding the 23 animals, double-click the scroll provided by the zookeeper. These scrolls are blessed, so they are safe to carry around while you search. | To see your progress towards finding the 23 animals, double-click the scroll provided by the zookeeper. These scrolls are blessed, so they are safe to carry around while you search. | ||
<html><div style="margin: | <html><div style="margin: 14px 0 22px 0;"><a href="/wiki/images/zookeeper/2324.webp" target="_blank"><img src="/wiki/images/zookeeper/2324.webp" alt="Zookeeper Quest Scroll Gump" style="width: 100%; max-width: 520px; border: 2px solid rgba(212, 175, 55, 0.55); border-radius: 6px; box-shadow: 0 6px 18px rgba(0,0,0,0.7); display: block; transition: transform 0.2s;" /></a></div></html> | ||
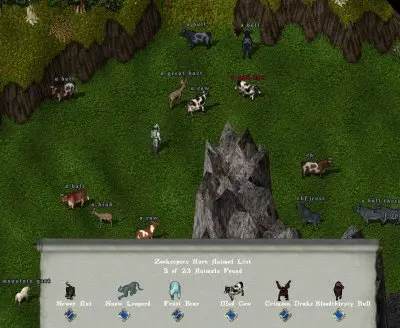
To find the animals you will have to search high and low where these animals are normally found. They are not tied to a specific location or place in the world. Once you find one of the rare animals and tame it you will need to bring it to the Zookeeper. | To find the animals you will have to search high and low where these animals are normally found. They are not tied to a specific location or place in the world. Once you find one of the rare animals and tame it you will need to bring it to the Zookeeper. | ||
<html><div style="margin: | <html><div style="margin: 14px 0 22px 0;"><a href="/wiki/images/zookeeper/2325.webp" target="_blank"><img src="/wiki/images/zookeeper/2325.webp" alt="Taming rare animals in the wild" style="width: 100%; max-width: 520px; border: 2px solid rgba(212, 175, 55, 0.55); border-radius: 6px; box-shadow: 0 6px 18px rgba(0,0,0,0.7); display: block; transition: transform 0.2s;" /></a></div></html> | ||
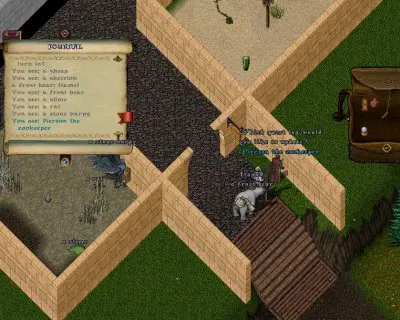
To turn in pets you have found to the Zookeeper say the word "Quest" and target the scroll you wish to complete. Once you target the scroll you will then target the animal to turn in. | To turn in pets you have found to the Zookeeper say the word "Quest" and target the scroll you wish to complete. Once you target the scroll you will then target the animal to turn in. | ||
<html><div style="margin: | <html><div style="margin: 14px 0 22px 0;"><a href="/wiki/images/zookeeper/2326.webp" target="_blank"><img src="/wiki/images/zookeeper/2326.webp" alt="Saying Quest to turn in pet" style="width: 100%; max-width: 520px; border: 2px solid rgba(212, 175, 55, 0.55); border-radius: 6px; box-shadow: 0 6px 18px rgba(0,0,0,0.7); display: block; transition: transform 0.2s;" /></a></div></html> | ||
Once you turn in an animal the Zookeeper will tell you about your progress finding the animals he needs. | Once you turn in an animal the Zookeeper will tell you about your progress finding the animals he needs. | ||
<html><div style="margin: | <html><div style="margin: 14px 0 22px 0;"><a href="/wiki/images/zookeeper/2327.webp" target="_blank"><img src="/wiki/images/zookeeper/2327.webp" alt="Zookeeper progress dialogue" style="width: 100%; max-width: 520px; border: 2px solid rgba(212, 175, 55, 0.55); border-radius: 6px; box-shadow: 0 6px 18px rgba(0,0,0,0.7); display: block; transition: transform 0.2s;" /></a></div></html> | ||
Once turned in the animals are added to the Zoo. | Once turned in the animals are added to the Zoo. | ||
<html><div style="margin: | <html><div style="margin: 14px 0 22px 0;"><a href="/wiki/images/zookeeper/2328.webp" target="_blank"><img src="/wiki/images/zookeeper/2328.webp" alt="Rare animals in Moonglow Zoo enclosure" style="width: 100%; max-width: 520px; border: 2px solid rgba(212, 175, 55, 0.55); border-radius: 6px; box-shadow: 0 6px 18px rgba(0,0,0,0.7); display: block; transition: transform 0.2s;" /></a></div></html> | ||
As you progress in finding all 23 animals the scroll will be updated with checks next to each animal. | As you progress in finding all 23 animals the scroll will be updated with checks next to each animal. | ||
<html><div style="margin: | <html><div style="margin: 14px 0 22px 0;"><a href="/wiki/images/zookeeper/2329.webp" target="_blank"><img src="/wiki/images/zookeeper/2329.webp" alt="Checked scroll with 23 animals" style="width: 100%; max-width: 520px; border: 2px solid rgba(212, 175, 55, 0.55); border-radius: 6px; box-shadow: 0 6px 18px rgba(0,0,0,0.7); display: block; transition: transform 0.2s;" /></a></div></html> | ||
Once your scroll is complete drag it onto the zookeeper and he will reward you with a magical scroll. This scroll will transport you to a strange lost land where you can improve your skills as an animal tamer. Warning! This item can only be used once so make sure you are prepared. | Once your scroll is complete drag it onto the zookeeper and he will reward you with a magical scroll. This scroll will transport you to a strange lost land where you can improve your skills as an animal tamer. Warning! This item can only be used once so make sure you are prepared. | ||
<html><div style="margin: | <html><div style="margin: 14px 0 22px 0;"><a href="/wiki/images/zookeeper/2330.webp" target="_blank"><img src="/wiki/images/zookeeper/2330.webp" alt="Dragging complete scroll onto zookeeper" style="width: 100%; max-width: 520px; border: 2px solid rgba(212, 175, 55, 0.55); border-radius: 6px; box-shadow: 0 6px 18px rgba(0,0,0,0.7); display: block; transition: transform 0.2s;" /></a></div></html> | ||
The warning before using the scroll. | The warning before using the scroll. | ||
<html><div style="margin: | <html><div style="margin: 14px 0 22px 0;"><a href="/wiki/images/zookeeper/2331.webp" target="_blank"><img src="/wiki/images/zookeeper/2331.webp" alt="Scroll activation warning" style="width: 100%; max-width: 520px; border: 2px solid rgba(212, 175, 55, 0.55); border-radius: 6px; box-shadow: 0 6px 18px rgba(0,0,0,0.7); display: block; transition: transform 0.2s;" /></a></div></html> | ||
Arriving in a strange land. The expedition has been stuck here for a while unable to proceed so they have setup camp with a banker, stable, provisioner and healer. | Arriving in a strange land. The expedition has been stuck here for a while unable to proceed so they have setup camp with a banker, stable, provisioner and healer. | ||
<html><div style="display: flex; flex-wrap: wrap; gap: | <html><div style="display: flex; flex-wrap: wrap; gap: 14px; margin: 14px 0 22px 0;"><a href="/wiki/images/zookeeper/2332.webp" target="_blank" style="flex: 1 1 260px; max-width: 500px;"><img src="/wiki/images/zookeeper/2332.webp" alt="Expedition camp 1" style="width: 100%; border: 2px solid rgba(212, 175, 55, 0.55); border-radius: 6px; box-shadow: 0 6px 18px rgba(0,0,0,0.7); display: block;" /></a><a href="/wiki/images/zookeeper/2333.webp" target="_blank" style="flex: 1 1 260px; max-width: 500px;"><img src="/wiki/images/zookeeper/2333.webp" alt="Expedition camp 2" style="width: 100%; border: 2px solid rgba(212, 175, 55, 0.55); border-radius: 6px; box-shadow: 0 6px 18px rgba(0,0,0,0.7); display: block;" /></a><a href="/wiki/images/zookeeper/2334.webp" target="_blank" style="flex: 1 1 260px; max-width: 500px;"><img src="/wiki/images/zookeeper/2334.webp" alt="Expedition camp 3" style="width: 100%; border: 2px solid rgba(212, 175, 55, 0.55); border-radius: 6px; box-shadow: 0 6px 18px rgba(0,0,0,0.7); display: block;" /></a></div></html> | ||
You can speak to the village elder in his hut to learn more about the problems plaguing his expedition. Shortly after setting up camp they encountered some humans that having been so long list in the wilds had learned how to commune with dangerous creatures and direct them to do their bidding. If you can defeat them he think he can teach your party how to successfully establish a bond with more pets. | You can speak to the village elder in his hut to learn more about the problems plaguing his expedition. Shortly after setting up camp they encountered some humans that having been so long list in the wilds had learned how to commune with dangerous creatures and direct them to do their bidding. If you can defeat them he think he can teach your party how to successfully establish a bond with more pets. | ||
<html><div style="margin: | <html><div style="margin: 14px 0 22px 0;"><a href="/wiki/images/zookeeper/2335.webp" target="_blank"><img src="/wiki/images/zookeeper/2335.webp" alt="Village Elder in his hut" style="width: 100%; max-width: 520px; border: 2px solid rgba(212, 175, 55, 0.55); border-radius: 6px; box-shadow: 0 6px 18px rgba(0,0,0,0.7); display: block; transition: transform 0.2s;" /></a></div></html> | ||
The first of the dangerous tamers, the beast tamer. Should he be threatened he will summon the Colossus, Obsidian Gargoyle, a Two Headed Behemoth and a Jungle Titan. | The first of the dangerous tamers, the beast tamer. Should he be threatened he will summon the Colossus, Obsidian Gargoyle, a Two Headed Behemoth and a Jungle Titan. | ||
<html><div style="margin: | <html><div style="margin: 14px 0 22px 0;"><a href="/wiki/images/zookeeper/2336.webp" target="_blank"><img src="/wiki/images/zookeeper/2336.webp" alt="The Beast Tamer and summoned beasts" style="width: 100%; max-width: 520px; border: 2px solid rgba(212, 175, 55, 0.55); border-radius: 6px; box-shadow: 0 6px 18px rgba(0,0,0,0.7); display: block; transition: transform 0.2s;" /></a></div></html> | ||
Next players will have to contend with the Reptile tamer, a strange humanoid with exceptional skills in making dangerous reptiles do his bidding. He will summon a Land Shark, the Ophidian Queen, A Wyvern Monatch and an Anaconda to defend him should he be attacked. | Next players will have to contend with the Reptile tamer, a strange humanoid with exceptional skills in making dangerous reptiles do his bidding. He will summon a Land Shark, the Ophidian Queen, A Wyvern Monatch and an Anaconda to defend him should he be attacked. | ||
<html><div style="margin: | <html><div style="margin: 14px 0 22px 0;"><a href="/wiki/images/zookeeper/2337.webp" target="_blank"><img src="/wiki/images/zookeeper/2337.webp" alt="The Reptile Tamer and dangerous reptiles" style="width: 100%; max-width: 520px; border: 2px solid rgba(212, 175, 55, 0.55); border-radius: 6px; box-shadow: 0 6px 18px rgba(0,0,0,0.7); display: block; transition: transform 0.2s;" /></a></div></html> | ||
Very little is known about the final monster hidden deep in the jungle as no one has returned alive. There are rumors of a camp of knights hidden in the jungle who can provide assistance to the adventurers. | Very little is known about the final monster hidden deep in the jungle as no one has returned alive. There are rumors of a camp of knights hidden in the jungle who can provide assistance to the adventurers. | ||
<html><div style="display: flex; flex-wrap: wrap; gap: | <html><div style="display: flex; flex-wrap: wrap; gap: 14px; margin: 14px 0 22px 0;"><a href="/wiki/images/zookeeper/2338.webp" target="_blank" style="flex: 1 1 260px; max-width: 500px;"><img src="/wiki/images/zookeeper/2338.webp" alt="Jungle pathway" style="width: 100%; border: 2px solid rgba(212, 175, 55, 0.55); border-radius: 6px; box-shadow: 0 6px 18px rgba(0,0,0,0.7); display: block;" /></a><a href="/wiki/images/zookeeper/2339.webp" target="_blank" style="flex: 1 1 260px; max-width: 500px;"><img src="/wiki/images/zookeeper/2339.webp" alt="Camp of knights hidden in jungle" style="width: 100%; border: 2px solid rgba(212, 175, 55, 0.55); border-radius: 6px; box-shadow: 0 6px 18px rgba(0,0,0,0.7); display: block;" /></a></div></html> | ||
Should the players somehow manage the defeat these creatures they should return to the village elder. Once there make sure you use the scroll provided to you by the zookeeper to select the adventurers that helped you survive the horrors of this jungle. | Should the players somehow manage the defeat these creatures they should return to the village elder. Once there make sure you use the scroll provided to you by the zookeeper to select the adventurers that helped you survive the horrors of this jungle. | ||
<html><div style="margin: | <html><div style="margin: 14px 0 22px 0;"><a href="/wiki/images/zookeeper/2340.webp" target="_blank"><img src="/wiki/images/zookeeper/2340.webp" alt="Selecting adventurers with the scroll" style="width: 100%; max-width: 520px; border: 2px solid rgba(212, 175, 55, 0.55); border-radius: 6px; box-shadow: 0 6px 18px rgba(0,0,0,0.7); display: block; transition: transform 0.2s;" /></a></div></html> | ||
Once you have your party set, drag the scroll onto the Elder. | Once you have your party set, drag the scroll onto the Elder. | ||
<html><div style="margin: | <html><div style="margin: 14px 0 22px 0;"><a href="/wiki/images/zookeeper/2341.webp" target="_blank"><img src="/wiki/images/zookeeper/2341.webp" alt="Dragging scroll onto the Elder" style="width: 100%; max-width: 520px; border: 2px solid rgba(212, 175, 55, 0.55); border-radius: 6px; box-shadow: 0 6px 18px rgba(0,0,0,0.7); display: block; transition: transform 0.2s;" /></a></div></html> | ||
He will ask you if you are sure you are ready to learn about advanced pet bonding. Pay close attention to the amount of players he sees before you click ok. | He will ask you if you are sure you are ready to learn about advanced pet bonding. Pay close attention to the amount of players he sees before you click ok. | ||
<html><div style="margin: | <html><div style="margin: 14px 0 22px 0;"><a href="/wiki/images/zookeeper/2342.webp" target="_blank"><img src="/wiki/images/zookeeper/2342.webp" alt="Elder confirmation prompt" style="width: 100%; max-width: 520px; border: 2px solid rgba(212, 175, 55, 0.55); border-radius: 6px; box-shadow: 0 6px 18px rgba(0,0,0,0.7); display: block; transition: transform 0.2s;" /></a></div></html> | ||
He will teach everyone in your party how to bond one additional pet. | He will teach everyone in your party how to bond one additional pet. | ||
<html><div style="margin: | <html><div style="margin: 14px 0 22px 0;"><a href="/wiki/images/zookeeper/2343.webp" target="_blank"><img src="/wiki/images/zookeeper/2343.webp" alt="Teaching advanced pet bonding" style="width: 100%; max-width: 520px; border: 2px solid rgba(212, 175, 55, 0.55); border-radius: 6px; box-shadow: 0 6px 18px rgba(0,0,0,0.7); display: block; transition: transform 0.2s;" /></a></div></html> | ||
To leave this strange land choose from one of the provided gates. | To leave this strange land choose from one of the provided gates. | ||
<html><div style="margin: | <html><div style="margin: 14px 0 22px 0;"><a href="/wiki/images/zookeeper/2344.webp" target="_blank"><img src="/wiki/images/zookeeper/2344.webp" alt="Return moongates" style="width: 100%; max-width: 520px; border: 2px solid rgba(212, 175, 55, 0.55); border-radius: 6px; box-shadow: 0 6px 18px rgba(0,0,0,0.7); display: block; transition: transform 0.2s;" /></a></div></html> | ||
</div> | </div> | ||
| Line 81: | Line 83: | ||
== Part 2: Question & Answer, Bonding Expansion FAQ == | == Part 2: Question & Answer, Bonding Expansion FAQ == | ||
<div style="background: rgba(22, 17, 11, 0.65); border: 1px solid rgba(212, 175, 55, 0.35); border-radius: 8px; padding: | <div style="background: rgba(22, 17, 11, 0.65); border: 1px solid rgba(212, 175, 55, 0.35); border-radius: 8px; padding: 22px 26px; margin: 16px 0 24px 0; box-shadow: 0 4px 16px rgba(0,0,0,0.5); font-size: 1.05rem; line-height: 1.7;"> | ||
<div style="margin-bottom: 18px; padding-bottom: | <div style="margin-bottom: 18px; padding-bottom: 14px; border-bottom: 1px solid rgba(212, 175, 55, 0.15);"> | ||
<b><span style="color: rgb(184, 49, 47)">Q.</span></b> How many times can you complete the quest to obtain more bonded pets?<br/> | <b><span style="color: rgb(184, 49, 47); font-size: 1.15rem;">Q.</span></b> <b>How many times can you complete the quest to obtain more bonded pets?</b><br/> | ||
A. You can complete it as many times as you like. There is no limited on the amount of bonded pets you can earn. | A. You can complete it as many times as you like. There is no limited on the amount of bonded pets you can earn. | ||
</div> | </div> | ||
<div style="margin-bottom: 18px; padding-bottom: | <div style="margin-bottom: 18px; padding-bottom: 14px; border-bottom: 1px solid rgba(212, 175, 55, 0.15);"> | ||
<b><span style="color: rgb(184, 49, 47)">Q.</span></b> How many players can learn how to bond an additional pet when finishing the quest.<br/> | <b><span style="color: rgb(184, 49, 47); font-size: 1.15rem;">Q.</span></b> <b>How many players can learn how to bond an additional pet when finishing the quest.</b><br/> | ||
A. The scroll owner can select a maximum of 9 players before turning in the scroll to the quest elder. | A. The scroll owner can select a maximum of 9 players before turning in the scroll to the quest elder. | ||
</div> | </div> | ||
<div style="margin-bottom: 18px; padding-bottom: | <div style="margin-bottom: 18px; padding-bottom: 14px; border-bottom: 1px solid rgba(212, 175, 55, 0.15);"> | ||
<b><span style="color: rgb(184, 49, 47)">Q.</span></b> How many players can participate in the event using the scroll.<br/> | <b><span style="color: rgb(184, 49, 47); font-size: 1.15rem;">Q.</span></b> <b>How many players can participate in the event using the scroll.</b><br/> | ||
A. Unlimited, however only the 9 players that the scroll owner selects can learn how to bond another pet. | A. Unlimited, however only the 9 players that the scroll owner selects can learn how to bond another pet. | ||
</div> | </div> | ||
<div style="margin-bottom: 18px; padding-bottom: | <div style="margin-bottom: 18px; padding-bottom: 14px; border-bottom: 1px solid rgba(212, 175, 55, 0.15);"> | ||
<b><span style="color: rgb(184, 49, 47)">Q.</span></b> What if I lose the scroll during the event.<br/> | <b><span style="color: rgb(184, 49, 47); font-size: 1.15rem;">Q.</span></b> <b>What if I lose the scroll during the event.</b><br/> | ||
A. Once you use the scroll to begin the event it becomes blessed. | A. Once you use the scroll to begin the event it becomes blessed. | ||
</div> | </div> | ||
<div style="margin-bottom: 18px; padding-bottom: | <div style="margin-bottom: 18px; padding-bottom: 14px; border-bottom: 1px solid rgba(212, 175, 55, 0.15);"> | ||
<b><span style="color: rgb(184, 49, 47)">Q.</span></b> Do players need to complete the Zookeepers quest to take part in the Event?<br/> | <b><span style="color: rgb(184, 49, 47); font-size: 1.15rem;">Q.</span></b> <b>Do players need to complete the Zookeepers quest to take part in the Event?</b><br/> | ||
A. No. Similar to Ancient MIB's the Quest scroll will open a gate for 60 seconds allowing any players to take part. Players are however encouraged to work together to complete the zookeepers quest as you can tame, stable, and transfer the rare pets working to complete a single scroll. | A. No. Similar to Ancient MIB's the Quest scroll will open a gate for 60 seconds allowing any players to take part. Players are however encouraged to work together to complete the zookeepers quest as you can tame, stable, and transfer the rare pets working to complete a single scroll. | ||
</div> | </div> | ||
<div style="margin-bottom: 18px; padding-bottom: | <div style="margin-bottom: 18px; padding-bottom: 14px; border-bottom: 1px solid rgba(212, 175, 55, 0.15);"> | ||
<b><span style="color: rgb(184, 49, 47)">Q.</span></b> What if I lose the Zookeepers quest scroll?<br/> | <b><span style="color: rgb(184, 49, 47); font-size: 1.15rem;">Q.</span></b> <b>What if I lose the Zookeepers quest scroll?</b><br/> | ||
A. The quest scroll is blessed and should be safe from loss. However if you lose it by non standard means it cannot be replaced. You need to bring it with you to the zookeeper each time you find another pet to turn in. | A. The quest scroll is blessed and should be safe from loss. However if you lose it by non standard means it cannot be replaced. You need to bring it with you to the zookeeper each time you find another pet to turn in. | ||
</div> | </div> | ||
<div style="margin-bottom: 18px; padding-bottom: | <div style="margin-bottom: 18px; padding-bottom: 14px; border-bottom: 1px solid rgba(212, 175, 55, 0.15);"> | ||
<b><span style="color: rgb(184, 49, 47)">Q.</span></b> Can I earn an ironman award for the Wild Tamer event?<br/> | <b><span style="color: rgb(184, 49, 47); font-size: 1.15rem;">Q.</span></b> <b>Can I earn an ironman award for the Wild Tamer event?</b><br/> | ||
A. Yes. The scroll owner at the completion of the event will be given information about how you did when attempting the ironman version of the event. Players will be rewarded with special ironman trophies should they defeat the event using only 2 characters. A detailed ironman guide will be posted later. | A. Yes. The scroll owner at the completion of the event will be given information about how you did when attempting the ironman version of the event. Players will be rewarded with special ironman trophies should they defeat the event using only 2 characters. A detailed ironman guide will be posted later. | ||
</div> | </div> | ||
<div style="margin-bottom: 18px; padding-bottom: | <div style="margin-bottom: 18px; padding-bottom: 14px; border-bottom: 1px solid rgba(212, 175, 55, 0.15);"> | ||
<b><span style="color: rgb(184, 49, 47)">Q.</span></b> Is there a rare spawn in the event area?<br/> | <b><span style="color: rgb(184, 49, 47); font-size: 1.15rem;">Q.</span></b> <b>Is there a rare spawn in the event area?</b><br/> | ||
A. Yes. Although you will have to find it. | A. Yes. Although you will have to find it. | ||
</div> | </div> | ||
<div style="margin-bottom: 18px; padding-bottom: | <div style="margin-bottom: 18px; padding-bottom: 14px; border-bottom: 1px solid rgba(212, 175, 55, 0.15);"> | ||
<span style="color: rgb(184, 49, 47)"><b>Q.</b></span> Can I keep the gilded dragon as a pet?<br/> | <span style="color: rgb(184, 49, 47); font-size: 1.15rem;"><b>Q.</b></span> <b>Can I keep the gilded dragon as a pet?</b><br/> | ||
A. Yes. However it is not quite as strong as a normal dragon. | A. Yes. However it is not quite as strong as a normal dragon. | ||
</div> | </div> | ||
<div style="margin-bottom: 18px; padding-bottom: | <div style="margin-bottom: 18px; padding-bottom: 14px; border-bottom: 1px solid rgba(212, 175, 55, 0.15);"> | ||
<b><span style="color: rgb(184, 49, 47)">Q.</span></b> What if I die during the event?<br/> | <b><span style="color: rgb(184, 49, 47); font-size: 1.15rem;">Q.</span></b> <b>What if I die during the event?</b><br/> | ||
A. A banker, healer, stable master, provisoner and variety dealer are provided should one of your party perish during the event. | A. A banker, healer, stable master, provisoner and variety dealer are provided should one of your party perish during the event. | ||
</div> | </div> | ||
<div style="margin-bottom: 18px; padding-bottom: | <div style="margin-bottom: 18px; padding-bottom: 14px; border-bottom: 1px solid rgba(212, 175, 55, 0.15);"> | ||
<b><span style="color: rgb(184, 49, 47)">Q.</span></b> How long do we have to defeat the 3 bosses and return to the Elder?<br/> | <b><span style="color: rgb(184, 49, 47); font-size: 1.15rem;">Q.</span></b> <b>How long do we have to defeat the 3 bosses and return to the Elder?</b><br/> | ||
A. Players will have 2 hours to complete the event. Various clocks placed around the event will show you how much time is left. | A. Players will have 2 hours to complete the event. Various clocks placed around the event will show you how much time is left. | ||
</div> | </div> | ||
<div style="margin-bottom: 18px; padding-bottom: | <div style="margin-bottom: 18px; padding-bottom: 14px; border-bottom: 1px solid rgba(212, 175, 55, 0.15);"> | ||
<b><span style="color: rgb(184, 49, 47)">Q.</span></b> Once I have more bonded pets, what if I lose one?<br/> | <b><span style="color: rgb(184, 49, 47); font-size: 1.15rem;">Q.</span></b> <b>Once I have more bonded pets, what if I lose one?</b><br/> | ||
A. The pet summoning balls have been upgraded as well to allow for better pet management. You can read more about them here | A. The pet summoning balls have been upgraded as well to allow for better pet management. You can read more about them here | ||
</div> | </div> | ||
<div style="margin-bottom: 8px;"> | <div style="margin-bottom: 8px;"> | ||
<b><span style="color: rgb(184, 49, 47)">Q.</span></b> Is there any treasure to be found in the event?<br/> | <b><span style="color: rgb(184, 49, 47); font-size: 1.15rem;">Q.</span></b> <b>Is there any treasure to be found in the event?</b><br/> | ||
A. Yes. Each boss is defending a personal stash of loot, and carries the key to that chest. The chests can also be unlocked by a lockpicker. Additional rare spawns may be found in the event as well along with special items dropped from the various monsters. | A. Yes. Each boss is defending a personal stash of loot, and carries the key to that chest. The chests can also be unlocked by a lockpicker. Additional rare spawns may be found in the event as well along with special items dropped from the various monsters. | ||
</div> | </div> | ||
| Line 153: | Line 155: | ||
== Part 3: Animals That You Have Been Tasked to Find by the Zoo Keeper == | == Part 3: Animals That You Have Been Tasked to Find by the Zoo Keeper == | ||
<div style="background: rgba(22, 17, 11, 0.65); border: 1px solid rgba(212, 175, 55, 0.35); border-radius: 8px; padding: | <div style="background: rgba(22, 17, 11, 0.65); border: 1px solid rgba(212, 175, 55, 0.35); border-radius: 8px; padding: 22px 26px; margin: 16px 0 24px 0; box-shadow: 0 4px 16px rgba(0,0,0,0.5);"> | ||
<div style="color: #ffd700; font-size: 1. | <div style="color: #ffd700; font-size: 1.15rem; font-style: italic; margin-bottom: 22px;">Animals that you have been tasked to find by the Zoo Keeper:</div> | ||
<div style=" | <div style="background: rgba(18, 14, 9, 0.75); border: 1px solid rgba(212, 175, 55, 0.4); border-radius: 8px; padding: 18px; margin-bottom: 24px; box-shadow: 0 4px 14px rgba(0,0,0,0.6);"> | ||
<div style="color: rgb(184, 49, 47); font-weight: bold; font-size: 1.3rem; font-family: 'Cinzel Decorative', serif; letter-spacing: 0.5px; margin-bottom: 4px;">Albino Wyrm</div> | |||
<div style="color: #e6dfd1; font-size: 1.05rem; margin-bottom: 12px; font-style: italic;">Commonly found with <span style="color: #ffd700; font-weight: bold;">White Wyrms</span></div> | |||
<html><div><a href="/wiki/images/zookeeper/2345.webp" target="_blank"><img src="/wiki/images/zookeeper/2345.webp" alt="Albino Wyrm" style="width: 100%; max-width: 440px; border: 2px solid rgba(212, 175, 55, 0.5); border-radius: 6px; box-shadow: 0 6px 16px rgba(0,0,0,0.7); display: block;" /></a></div></html> | |||
</div> | </div><div style="background: rgba(18, 14, 9, 0.75); border: 1px solid rgba(212, 175, 55, 0.4); border-radius: 8px; padding: 18px; margin-bottom: 24px; box-shadow: 0 4px 14px rgba(0,0,0,0.6);"> | ||
<div style=" | <div style="color: rgb(184, 49, 47); font-weight: bold; font-size: 1.3rem; font-family: 'Cinzel Decorative', serif; letter-spacing: 0.5px; margin-bottom: 4px;">Arctic Wolf</div> | ||
<span style="color: | <div style="color: #e6dfd1; font-size: 1.05rem; margin-bottom: 12px; font-style: italic;">Commonly found with <span style="color: #ffd700; font-weight: bold;">White Wolves</span></div> | ||
<html><div><a href="/wiki/images/zookeeper/2346.webp" target="_blank"><img src="/wiki/images/zookeeper/2346.webp" alt="Arctic Wolf" style="width: 100%; max-width: 440px; border: 2px solid rgba(212, 175, 55, 0.5); border-radius: 6px; box-shadow: 0 6px 16px rgba(0,0,0,0.7); display: block;" /></a></div></html> | |||
< | </div><div style="background: rgba(18, 14, 9, 0.75); border: 1px solid rgba(212, 175, 55, 0.4); border-radius: 8px; padding: 18px; margin-bottom: 24px; box-shadow: 0 4px 14px rgba(0,0,0,0.6);"> | ||
</div> | <div style="color: rgb(184, 49, 47); font-weight: bold; font-size: 1.3rem; font-family: 'Cinzel Decorative', serif; letter-spacing: 0.5px; margin-bottom: 4px;">Black Sheep</div> | ||
<div style=" | <div style="color: #e6dfd1; font-size: 1.05rem; margin-bottom: 12px; font-style: italic;">Commonly found with <span style="color: #ffd700; font-weight: bold;">Sheep</span></div> | ||
<html><div><a href="/wiki/images/zookeeper/2347.webp" target="_blank"><img src="/wiki/images/zookeeper/2347.webp" alt="Black Sheep" style="width: 100%; max-width: 440px; border: 2px solid rgba(212, 175, 55, 0.5); border-radius: 6px; box-shadow: 0 6px 16px rgba(0,0,0,0.7); display: block;" /></a></div></html> | |||
</div><div style="background: rgba(18, 14, 9, 0.75); border: 1px solid rgba(212, 175, 55, 0.4); border-radius: 8px; padding: 18px; margin-bottom: 24px; box-shadow: 0 4px 14px rgba(0,0,0,0.6);"> | |||
<div style="color: rgb(184, 49, 47); font-weight: bold; font-size: 1.3rem; font-family: 'Cinzel Decorative', serif; letter-spacing: 0.5px; margin-bottom: 4px;">Bloodthirsty Bull</div> | |||
</div> | <div style="color: #e6dfd1; font-size: 1.05rem; margin-bottom: 12px; font-style: italic;">Commonly found with <span style="color: #ffd700; font-weight: bold;">Bulls</span></div> | ||
<div style=" | <html><div><a href="/wiki/images/zookeeper/2348.webp" target="_blank"><img src="/wiki/images/zookeeper/2348.webp" alt="Bloodthirsty Bull" style="width: 100%; max-width: 440px; border: 2px solid rgba(212, 175, 55, 0.5); border-radius: 6px; box-shadow: 0 6px 16px rgba(0,0,0,0.7); display: block;" /></a></div></html> | ||
< | </div><div style="background: rgba(18, 14, 9, 0.75); border: 1px solid rgba(212, 175, 55, 0.4); border-radius: 8px; padding: 18px; margin-bottom: 24px; box-shadow: 0 4px 14px rgba(0,0,0,0.6);"> | ||
<div style="color: rgb(184, 49, 47); font-weight: bold; font-size: 1.3rem; font-family: 'Cinzel Decorative', serif; letter-spacing: 0.5px; margin-bottom: 4px;">Crimson Drake</div> | |||
<div style="color: #e6dfd1; font-size: 1.05rem; margin-bottom: 12px; font-style: italic;">Commonly found with <span style="color: #ffd700; font-weight: bold;">Drakes</span></div> | |||
</div> | <html><div><a href="/wiki/images/zookeeper/2349.webp" target="_blank"><img src="/wiki/images/zookeeper/2349.webp" alt="Crimson Drake" style="width: 100%; max-width: 440px; border: 2px solid rgba(212, 175, 55, 0.5); border-radius: 6px; box-shadow: 0 6px 16px rgba(0,0,0,0.7); display: block;" /></a></div></html> | ||
<div style=" | </div><div style="background: rgba(18, 14, 9, 0.75); border: 1px solid rgba(212, 175, 55, 0.4); border-radius: 8px; padding: 18px; margin-bottom: 24px; box-shadow: 0 4px 14px rgba(0,0,0,0.6);"> | ||
<div style="color: rgb(184, 49, 47); font-weight: bold; font-size: 1.3rem; font-family: 'Cinzel Decorative', serif; letter-spacing: 0.5px; margin-bottom: 4px;">Crocodile</div> | |||
<div style="color: #e6dfd1; font-size: 1.05rem; margin-bottom: 12px; font-style: italic;">Commonly found with <span style="color: #ffd700; font-weight: bold;">Alligators</span></div> | |||
<html><div><a href="/wiki/images/zookeeper/2350.webp" target="_blank"><img src="/wiki/images/zookeeper/2350.webp" alt="Crocodile" style="width: 100%; max-width: 440px; border: 2px solid rgba(212, 175, 55, 0.5); border-radius: 6px; box-shadow: 0 6px 16px rgba(0,0,0,0.7); display: block;" /></a></div></html> | |||
</div> | </div><div style="background: rgba(18, 14, 9, 0.75); border: 1px solid rgba(212, 175, 55, 0.4); border-radius: 8px; padding: 18px; margin-bottom: 24px; box-shadow: 0 4px 14px rgba(0,0,0,0.6);"> | ||
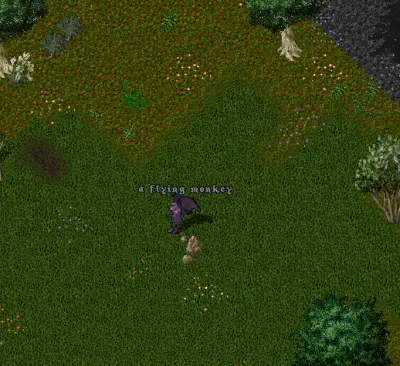
<div style=" | <div style="color: rgb(184, 49, 47); font-weight: bold; font-size: 1.3rem; font-family: 'Cinzel Decorative', serif; letter-spacing: 0.5px; margin-bottom: 4px;">Flying Monkey</div> | ||
<div style="color: #e6dfd1; font-size: 1.05rem; margin-bottom: 12px; font-style: italic;">Commonly found with <span style="color: #ffd700; font-weight: bold;">Mongbats</span></div> | |||
<html><div><a href="/wiki/images/zookeeper/2351.webp" target="_blank"><img src="/wiki/images/zookeeper/2351.webp" alt="Flying Monkey" style="width: 100%; max-width: 440px; border: 2px solid rgba(212, 175, 55, 0.5); border-radius: 6px; box-shadow: 0 6px 16px rgba(0,0,0,0.7); display: block;" /></a></div></html> | |||
</div><div style="background: rgba(18, 14, 9, 0.75); border: 1px solid rgba(212, 175, 55, 0.4); border-radius: 8px; padding: 18px; margin-bottom: 24px; box-shadow: 0 4px 14px rgba(0,0,0,0.6);"> | |||
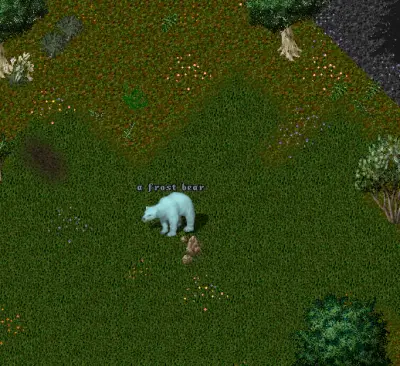
</div> | <div style="color: rgb(184, 49, 47); font-weight: bold; font-size: 1.3rem; font-family: 'Cinzel Decorative', serif; letter-spacing: 0.5px; margin-bottom: 4px;">Frost Bear</div> | ||
<div style=" | <div style="color: #e6dfd1; font-size: 1.05rem; margin-bottom: 12px; font-style: italic;">Commonly found with <span style="color: #ffd700; font-weight: bold;">Polar Bears</span></div> | ||
< | <html><div><a href="/wiki/images/zookeeper/2352.webp" target="_blank"><img src="/wiki/images/zookeeper/2352.webp" alt="Frost Bear" style="width: 100%; max-width: 440px; border: 2px solid rgba(212, 175, 55, 0.5); border-radius: 6px; box-shadow: 0 6px 16px rgba(0,0,0,0.7); display: block;" /></a></div></html> | ||
</div><div style="background: rgba(18, 14, 9, 0.75); border: 1px solid rgba(212, 175, 55, 0.4); border-radius: 8px; padding: 18px; margin-bottom: 24px; box-shadow: 0 4px 14px rgba(0,0,0,0.6);"> | |||
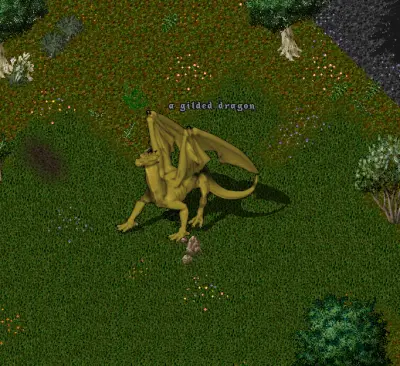
<div style="color: rgb(184, 49, 47); font-weight: bold; font-size: 1.3rem; font-family: 'Cinzel Decorative', serif; letter-spacing: 0.5px; margin-bottom: 4px;">Gilded Dragon</div> | |||
</div> | <div style="color: #e6dfd1; font-size: 1.05rem; margin-bottom: 12px; font-style: italic;">Commonly found with <span style="color: #ffd700; font-weight: bold;">Dragons</span></div> | ||
<div style=" | <html><div><a href="/wiki/images/zookeeper/2353.webp" target="_blank"><img src="/wiki/images/zookeeper/2353.webp" alt="Gilded Dragon" style="width: 100%; max-width: 440px; border: 2px solid rgba(212, 175, 55, 0.5); border-radius: 6px; box-shadow: 0 6px 16px rgba(0,0,0,0.7); display: block;" /></a></div></html> | ||
</div><div style="background: rgba(18, 14, 9, 0.75); border: 1px solid rgba(212, 175, 55, 0.4); border-radius: 8px; padding: 18px; margin-bottom: 24px; box-shadow: 0 4px 14px rgba(0,0,0,0.6);"> | |||
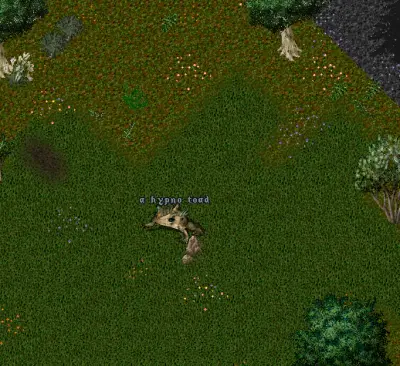
<div style="color: rgb(184, 49, 47); font-weight: bold; font-size: 1.3rem; font-family: 'Cinzel Decorative', serif; letter-spacing: 0.5px; margin-bottom: 4px;">Hypno Toad</div> | |||
<div style="color: #e6dfd1; font-size: 1.05rem; margin-bottom: 12px; font-style: italic;">Commonly found with <span style="color: #ffd700; font-weight: bold;">Giant Toads</span></div> | |||
</div> | <html><div><a href="/wiki/images/zookeeper/2354.webp" target="_blank"><img src="/wiki/images/zookeeper/2354.webp" alt="Hypno Toad" style="width: 100%; max-width: 440px; border: 2px solid rgba(212, 175, 55, 0.5); border-radius: 6px; box-shadow: 0 6px 16px rgba(0,0,0,0.7); display: block;" /></a></div></html> | ||
<div style=" | </div><div style="background: rgba(18, 14, 9, 0.75); border: 1px solid rgba(212, 175, 55, 0.4); border-radius: 8px; padding: 18px; margin-bottom: 24px; box-shadow: 0 4px 14px rgba(0,0,0,0.6);"> | ||
<div style="color: rgb(184, 49, 47); font-weight: bold; font-size: 1.3rem; font-family: 'Cinzel Decorative', serif; letter-spacing: 0.5px; margin-bottom: 4px;">jwilson</div> | |||
<div style="color: #e6dfd1; font-size: 1.05rem; margin-bottom: 12px; font-style: italic;">Commonly found with <span style="color: #ffd700; font-weight: bold;">Slimes</span></div> | |||
<html><div><a href="/wiki/images/zookeeper/2355.webp" target="_blank"><img src="/wiki/images/zookeeper/2355.webp" alt="jwilson" style="width: 100%; max-width: 440px; border: 2px solid rgba(212, 175, 55, 0.5); border-radius: 6px; box-shadow: 0 6px 16px rgba(0,0,0,0.7); display: block;" /></a></div></html> | |||
</div> | </div><div style="background: rgba(18, 14, 9, 0.75); border: 1px solid rgba(212, 175, 55, 0.4); border-radius: 8px; padding: 18px; margin-bottom: 24px; box-shadow: 0 4px 14px rgba(0,0,0,0.6);"> | ||
<div style=" | <div style="color: rgb(184, 49, 47); font-weight: bold; font-size: 1.3rem; font-family: 'Cinzel Decorative', serif; letter-spacing: 0.5px; margin-bottom: 4px;">King Scorpion</div> | ||
<div style="color: #e6dfd1; font-size: 1.05rem; margin-bottom: 12px; font-style: italic;">Commonly found with <span style="color: #ffd700; font-weight: bold;">Scorpions</span></div> | |||
<html><div><a href="/wiki/images/zookeeper/2356.webp" target="_blank"><img src="/wiki/images/zookeeper/2356.webp" alt="King Scorpion" style="width: 100%; max-width: 440px; border: 2px solid rgba(212, 175, 55, 0.5); border-radius: 6px; box-shadow: 0 6px 16px rgba(0,0,0,0.7); display: block;" /></a></div></html> | |||
</div><div style="background: rgba(18, 14, 9, 0.75); border: 1px solid rgba(212, 175, 55, 0.4); border-radius: 8px; padding: 18px; margin-bottom: 24px; box-shadow: 0 4px 14px rgba(0,0,0,0.6);"> | |||
</div> | <div style="color: rgb(184, 49, 47); font-weight: bold; font-size: 1.3rem; font-family: 'Cinzel Decorative', serif; letter-spacing: 0.5px; margin-bottom: 4px;">Mad Cow</div> | ||
<div style=" | <div style="color: #e6dfd1; font-size: 1.05rem; margin-bottom: 12px; font-style: italic;">Commonly found with <span style="color: #ffd700; font-weight: bold;">Cows</span></div> | ||
<html><div><a href="/wiki/images/zookeeper/2357.webp" target="_blank"><img src="/wiki/images/zookeeper/2357.webp" alt="Mad Cow" style="width: 100%; max-width: 440px; border: 2px solid rgba(212, 175, 55, 0.5); border-radius: 6px; box-shadow: 0 6px 16px rgba(0,0,0,0.7); display: block;" /></a></div></html> | |||
</div><div style="background: rgba(18, 14, 9, 0.75); border: 1px solid rgba(212, 175, 55, 0.4); border-radius: 8px; padding: 18px; margin-bottom: 24px; box-shadow: 0 4px 14px rgba(0,0,0,0.6);"> | |||
<div style="color: rgb(184, 49, 47); font-weight: bold; font-size: 1.3rem; font-family: 'Cinzel Decorative', serif; letter-spacing: 0.5px; margin-bottom: 4px;">Majestic Hart</div> | |||
</div> | <div style="color: #e6dfd1; font-size: 1.05rem; margin-bottom: 12px; font-style: italic;">Commonly found with <span style="color: #ffd700; font-weight: bold;">Great Harts</span></div> | ||
<div style=" | <html><div><a href="/wiki/images/zookeeper/2358.webp" target="_blank"><img src="/wiki/images/zookeeper/2358.webp" alt="Majestic Hart" style="width: 100%; max-width: 440px; border: 2px solid rgba(212, 175, 55, 0.5); border-radius: 6px; box-shadow: 0 6px 16px rgba(0,0,0,0.7); display: block;" /></a></div></html> | ||
</div><div style="background: rgba(18, 14, 9, 0.75); border: 1px solid rgba(212, 175, 55, 0.4); border-radius: 8px; padding: 18px; margin-bottom: 24px; box-shadow: 0 4px 14px rgba(0,0,0,0.6);"> | |||
<div style="color: rgb(184, 49, 47); font-weight: bold; font-size: 1.3rem; font-family: 'Cinzel Decorative', serif; letter-spacing: 0.5px; margin-bottom: 4px;">Raging Grizzly Bear</div> | |||
<div style="color: #e6dfd1; font-size: 1.05rem; margin-bottom: 12px; font-style: italic;">Commonly found with <span style="color: #ffd700; font-weight: bold;">Grizzly Bears</span></div> | |||
</div> | <html><div><a href="/wiki/images/zookeeper/2359.webp" target="_blank"><img src="/wiki/images/zookeeper/2359.webp" alt="Raging Grizzly Bear" style="width: 100%; max-width: 440px; border: 2px solid rgba(212, 175, 55, 0.5); border-radius: 6px; box-shadow: 0 6px 16px rgba(0,0,0,0.7); display: block;" /></a></div></html> | ||
<div style=" | </div><div style="background: rgba(18, 14, 9, 0.75); border: 1px solid rgba(212, 175, 55, 0.4); border-radius: 8px; padding: 18px; margin-bottom: 24px; box-shadow: 0 4px 14px rgba(0,0,0,0.6);"> | ||
<div style="color: rgb(184, 49, 47); font-weight: bold; font-size: 1.3rem; font-family: 'Cinzel Decorative', serif; letter-spacing: 0.5px; margin-bottom: 4px;">Ram</div> | |||
<div style="color: #e6dfd1; font-size: 1.05rem; margin-bottom: 12px; font-style: italic;">Commonly found with <span style="color: #ffd700; font-weight: bold;">Mountain Goat</span></div> | |||
<html><div><a href="/wiki/images/zookeeper/2360.webp" target="_blank"><img src="/wiki/images/zookeeper/2360.webp" alt="Ram" style="width: 100%; max-width: 440px; border: 2px solid rgba(212, 175, 55, 0.5); border-radius: 6px; box-shadow: 0 6px 16px rgba(0,0,0,0.7); display: block;" /></a></div></html> | |||
</div> | </div><div style="background: rgba(18, 14, 9, 0.75); border: 1px solid rgba(212, 175, 55, 0.4); border-radius: 8px; padding: 18px; margin-bottom: 24px; box-shadow: 0 4px 14px rgba(0,0,0,0.6);"> | ||
<div style=" | <div style="color: rgb(184, 49, 47); font-weight: bold; font-size: 1.3rem; font-family: 'Cinzel Decorative', serif; letter-spacing: 0.5px; margin-bottom: 4px;">RattleSnake</div> | ||
<div style="color: #e6dfd1; font-size: 1.05rem; margin-bottom: 12px; font-style: italic;">Commonly found with <span style="color: #ffd700; font-weight: bold;">Snakes</span></div> | |||
<html><div><a href="/wiki/images/zookeeper/2361.webp" target="_blank"><img src="/wiki/images/zookeeper/2361.webp" alt="RattleSnake" style="width: 100%; max-width: 440px; border: 2px solid rgba(212, 175, 55, 0.5); border-radius: 6px; box-shadow: 0 6px 16px rgba(0,0,0,0.7); display: block;" /></a></div></html> | |||
</div><div style="background: rgba(18, 14, 9, 0.75); border: 1px solid rgba(212, 175, 55, 0.4); border-radius: 8px; padding: 18px; margin-bottom: 24px; box-shadow: 0 4px 14px rgba(0,0,0,0.6);"> | |||
</div> | <div style="color: rgb(184, 49, 47); font-weight: bold; font-size: 1.3rem; font-family: 'Cinzel Decorative', serif; letter-spacing: 0.5px; margin-bottom: 4px;">Savage Ostard</div> | ||
<div style=" | <div style="color: #e6dfd1; font-size: 1.05rem; margin-bottom: 12px; font-style: italic;">Commonly found with <span style="color: #ffd700; font-weight: bold;">Frenzied Ostards</span></div> | ||
<html><div><a href="/wiki/images/zookeeper/2362.webp" target="_blank"><img src="/wiki/images/zookeeper/2362.webp" alt="Savage Ostard" style="width: 100%; max-width: 440px; border: 2px solid rgba(212, 175, 55, 0.5); border-radius: 6px; box-shadow: 0 6px 16px rgba(0,0,0,0.7); display: block;" /></a></div></html> | |||
</div><div style="background: rgba(18, 14, 9, 0.75); border: 1px solid rgba(212, 175, 55, 0.4); border-radius: 8px; padding: 18px; margin-bottom: 24px; box-shadow: 0 4px 14px rgba(0,0,0,0.6);"> | |||
<div style="color: rgb(184, 49, 47); font-weight: bold; font-size: 1.3rem; font-family: 'Cinzel Decorative', serif; letter-spacing: 0.5px; margin-bottom: 4px;">Sewer Rat</div> | |||
</div> | <div style="color: #e6dfd1; font-size: 1.05rem; margin-bottom: 12px; font-style: italic;">Commonly found with <span style="color: #ffd700; font-weight: bold;">Giant Rats</span></div> | ||
<div style=" | <html><div><a href="/wiki/images/zookeeper/2363.webp" target="_blank"><img src="/wiki/images/zookeeper/2363.webp" alt="Sewer Rat" style="width: 100%; max-width: 440px; border: 2px solid rgba(212, 175, 55, 0.5); border-radius: 6px; box-shadow: 0 6px 16px rgba(0,0,0,0.7); display: block;" /></a></div></html> | ||
</div><div style="background: rgba(18, 14, 9, 0.75); border: 1px solid rgba(212, 175, 55, 0.4); border-radius: 8px; padding: 18px; margin-bottom: 24px; box-shadow: 0 4px 14px rgba(0,0,0,0.6);"> | |||
<div style="color: rgb(184, 49, 47); font-weight: bold; font-size: 1.3rem; font-family: 'Cinzel Decorative', serif; letter-spacing: 0.5px; margin-bottom: 4px;">Silverback Gorilla</div> | |||
<div style="color: #e6dfd1; font-size: 1.05rem; margin-bottom: 12px; font-style: italic;">Commonly found with <span style="color: #ffd700; font-weight: bold;">Gorillas</span></div> | |||
</div> | <html><div><a href="/wiki/images/zookeeper/2364.webp" target="_blank"><img src="/wiki/images/zookeeper/2364.webp" alt="Silverback Gorilla" style="width: 100%; max-width: 440px; border: 2px solid rgba(212, 175, 55, 0.5); border-radius: 6px; box-shadow: 0 6px 16px rgba(0,0,0,0.7); display: block;" /></a></div></html> | ||
<div style=" | </div><div style="background: rgba(18, 14, 9, 0.75); border: 1px solid rgba(212, 175, 55, 0.4); border-radius: 8px; padding: 18px; margin-bottom: 24px; box-shadow: 0 4px 14px rgba(0,0,0,0.6);"> | ||
<div style="color: rgb(184, 49, 47); font-weight: bold; font-size: 1.3rem; font-family: 'Cinzel Decorative', serif; letter-spacing: 0.5px; margin-bottom: 4px;">Snow Jaguar</div> | |||
<div style="color: #e6dfd1; font-size: 1.05rem; margin-bottom: 12px; font-style: italic;">Commonly found with <span style="color: #ffd700; font-weight: bold;">Snow Leopards</span></div> | |||
<html><div><a href="/wiki/images/zookeeper/2365.webp" target="_blank"><img src="/wiki/images/zookeeper/2365.webp" alt="Snow Jaguar" style="width: 100%; max-width: 440px; border: 2px solid rgba(212, 175, 55, 0.5); border-radius: 6px; box-shadow: 0 6px 16px rgba(0,0,0,0.7); display: block;" /></a></div></html> | |||
</div> | </div><div style="background: rgba(18, 14, 9, 0.75); border: 1px solid rgba(212, 175, 55, 0.4); border-radius: 8px; padding: 18px; margin-bottom: 24px; box-shadow: 0 4px 14px rgba(0,0,0,0.6);"> | ||
<div style=" | <div style="color: rgb(184, 49, 47); font-weight: bold; font-size: 1.3rem; font-family: 'Cinzel Decorative', serif; letter-spacing: 0.5px; margin-bottom: 4px;">Wild Boar</div> | ||
< | <div style="color: #e6dfd1; font-size: 1.05rem; margin-bottom: 12px; font-style: italic;">Commonly found with <span style="color: #ffd700; font-weight: bold;">Pigs</span></div> | ||
<html><div><a href="/wiki/images/zookeeper/2366.webp" target="_blank"><img src="/wiki/images/zookeeper/2366.webp" alt="Wild Boar" style="width: 100%; max-width: 440px; border: 2px solid rgba(212, 175, 55, 0.5); border-radius: 6px; box-shadow: 0 6px 16px rgba(0,0,0,0.7); display: block;" /></a></div></html> | |||
</div></div> | |||
</div> | |||
<div style=" | |||
</div> | |||
<div style=" | |||
</div> | |||
<div style=" | |||
</div> | |||
<div style=" | |||
</div> | |||
</div> | |||
<span id="Part_4:_Strategy_for_completing_the_quest"></span> | <span id="Part_4:_Strategy_for_completing_the_quest"></span> | ||
== Part 4: Strategy for Completing the Quest == | == Part 4: Strategy for Completing the Quest == | ||
<div style="background: rgba(22, 17, 11, 0.65); border: 1px solid rgba(212, 175, 55, 0.35); border-radius: 8px; padding: | <div style="background: rgba(22, 17, 11, 0.65); border: 1px solid rgba(212, 175, 55, 0.35); border-radius: 8px; padding: 22px 26px; margin: 16px 0 24px 0; box-shadow: 0 4px 16px rgba(0,0,0,0.5); font-size: 1.05rem; line-height: 1.7;"> | ||
<div style="color: #c8b99d; font-style: italic; margin-bottom: | <div style="color: #c8b99d; font-style: italic; margin-bottom: 20px; font-size: 1rem;">Strategy for completing the quest by Dalavar, Jul 23, 2014.</div> | ||
<div style="font-family: 'Cinzel', serif; font-size: 1. | <div style="font-family: 'Cinzel', serif; font-size: 1.35rem; color: #ffd700; margin: 20px 0 10px 0; border-bottom: 1px solid rgba(212, 175, 55, 0.3); padding-bottom: 4px;"><u>What to bring</u></div> | ||
Dragons. Lots of dragons. Dragons are generally better than white wyrms because boss monsters take reduced damage from pet melee. Dragon firebreath, however, is not impacted by this damage reduction. You do have access to Stables from the taming area, so you can have extras in your stable to access. | Dragons. Lots of dragons. Dragons are generally better than white wyrms because boss monsters take reduced damage from pet melee. Dragon firebreath, however, is not impacted by this damage reduction. You do have access to Stables from the taming area, so you can have extras in your stable to access. | ||
<br/><br/> | <br/><br/> | ||
| Line 280: | Line 260: | ||
Bandages. Maybe 300 or so. Depending on your role, you may be able to stay safe and close to your pet, and veterinary is the best way to heal them in this case. | Bandages. Maybe 300 or so. Depending on your role, you may be able to stay safe and close to your pet, and veterinary is the best way to heal them in this case. | ||
<div style="font-family: 'Cinzel', serif; font-size: 1. | <div style="font-family: 'Cinzel', serif; font-size: 1.35rem; color: #ffd700; margin: 26px 0 10px 0; border-bottom: 1px solid rgba(212, 175, 55, 0.3); padding-bottom: 4px;"><u>Stage 1</u></div> | ||
<b>Enemies:</b> Reptile Tamer (boss), Anaconda, Wyvern Monarch, Ophidian Queen, Land Shark | <b>Enemies:</b> Reptile Tamer (boss), Anaconda, Wyvern Monarch, Ophidian Queen, Land Shark | ||
<br/><br/> | <br/><br/> | ||
<b>Strategy:</b> Take out the poisoning enemies first (Anaconda, Wyvern Monarch), while one person tanks the boss. Then once the minor spawn is cleared, gang up on the boss. The boss only has that initial spawn, so once it's gone it is safe to team up on him. Try to draw the enemies to the southeast to stay away from the monsters in stage 2. | <b>Strategy:</b> Take out the poisoning enemies first (Anaconda, Wyvern Monarch), while one person tanks the boss. Then once the minor spawn is cleared, gang up on the boss. The boss only has that initial spawn, so once it's gone it is safe to team up on him. Try to draw the enemies to the southeast to stay away from the monsters in stage 2. | ||
<div style="font-family: 'Cinzel', serif; font-size: 1. | <div style="font-family: 'Cinzel', serif; font-size: 1.35rem; color: #ffd700; margin: 26px 0 10px 0; border-bottom: 1px solid rgba(212, 175, 55, 0.3); padding-bottom: 4px;"><u>Stage 2</u></div> | ||
<b>Enemies:</b> Beast Tamer (boss), Colossus, Jungle Titan, Obsidian Gargoyle, Two-Headed Behemoth | <b>Enemies:</b> Beast Tamer (boss), Colossus, Jungle Titan, Obsidian Gargoyle, Two-Headed Behemoth | ||
<br/><br/> | <br/><br/> | ||
<b>Strategy:</b> One person tanks the boss. Then once the minor spawn is cleared, gang up on the boss. The boss only has that initial spawn, so once it's gone, it is safe to team up on him. Try to draw the enemies to the southeast to stay away from the monsters in stage 3. | <b>Strategy:</b> One person tanks the boss. Then once the minor spawn is cleared, gang up on the boss. The boss only has that initial spawn, so once it's gone, it is safe to team up on him. Try to draw the enemies to the southeast to stay away from the monsters in stage 3. | ||
<div style="font-family: 'Cinzel', serif; font-size: 1. | <div style="font-family: 'Cinzel', serif; font-size: 1.35rem; color: #ffd700; margin: 26px 0 10px 0; border-bottom: 1px solid rgba(212, 175, 55, 0.3); padding-bottom: 4px;"><u>Stage 3</u></div> | ||
<b>Enemies:</b> Spectral Rabbit, Rabbit of Caerbannog | <b>Enemies:</b> Spectral Rabbit, Rabbit of Caerbannog | ||
<br/><br/> | <br/><br/> | ||
| Line 299: | Line 279: | ||
If a spectral rabbit or two goes after the dragons tanking the boss, take them out quickly and ensure the dragons tanking the boss are kept healthy. This is the biggest threat during this stage. | If a spectral rabbit or two goes after the dragons tanking the boss, take them out quickly and ensure the dragons tanking the boss are kept healthy. This is the biggest threat during this stage. | ||
<div style="font-family: 'Cinzel', serif; font-size: 1. | <div style="font-family: 'Cinzel', serif; font-size: 1.35rem; color: #ffd700; margin: 26px 0 10px 0; border-bottom: 1px solid rgba(212, 175, 55, 0.3); padding-bottom: 4px;"><u>Rewards</u></div> | ||
Each boss has a chest key to a nearby chest. There is platinum in the chests, and it is otherwise standard treasure map fare. The chests are required to be looted for the Ironman prize, but not for the bonding slots. It may be wise to bring an alt that can Lockpick; that way, if you accidentally lose a key, you can still open the chests. | Each boss has a chest key to a nearby chest. There is platinum in the chests, and it is otherwise standard treasure map fare. The chests are required to be looted for the Ironman prize, but not for the bonding slots. It may be wise to bring an alt that can Lockpick; that way, if you accidentally lose a key, you can still open the chests. | ||
<br/><br/> | <br/><br/> | ||
Latest revision as of 12:31, 9 September 2026
Part 1: Quest Walkthrough
From patch 52, players will be able to attempt the Zookeepers Quest in order to earn additional bonded pets.
To begin the quest, players should seek out the Moonglow Zookeeper. He wants to expand the variety of monsters in the zoo. To help him find new animals, you can buy his list of needed pets for 4,995 gold.
To see your progress towards finding the 23 animals, double-click the scroll provided by the zookeeper. These scrolls are blessed, so they are safe to carry around while you search.
To find the animals you will have to search high and low where these animals are normally found. They are not tied to a specific location or place in the world. Once you find one of the rare animals and tame it you will need to bring it to the Zookeeper.
To turn in pets you have found to the Zookeeper say the word "Quest" and target the scroll you wish to complete. Once you target the scroll you will then target the animal to turn in.
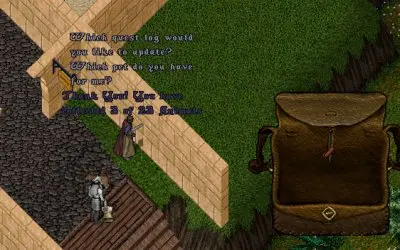
Once you turn in an animal the Zookeeper will tell you about your progress finding the animals he needs.
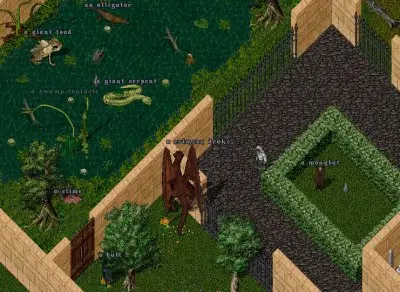
Once turned in the animals are added to the Zoo.
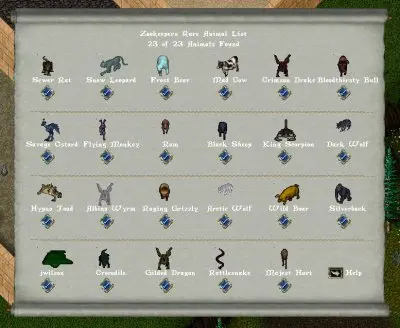
As you progress in finding all 23 animals the scroll will be updated with checks next to each animal.
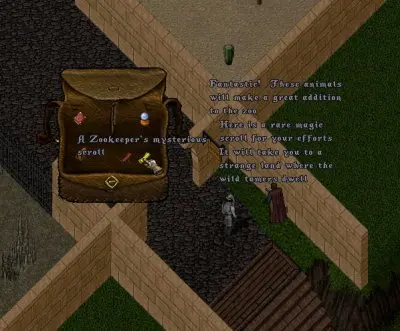
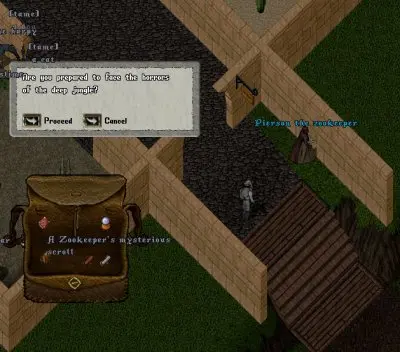
Once your scroll is complete drag it onto the zookeeper and he will reward you with a magical scroll. This scroll will transport you to a strange lost land where you can improve your skills as an animal tamer. Warning! This item can only be used once so make sure you are prepared.
The warning before using the scroll.
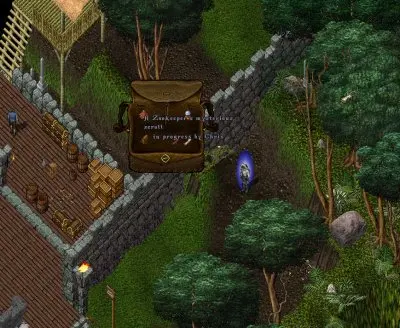
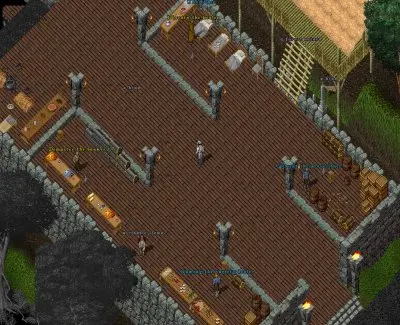
Arriving in a strange land. The expedition has been stuck here for a while unable to proceed so they have setup camp with a banker, stable, provisioner and healer.
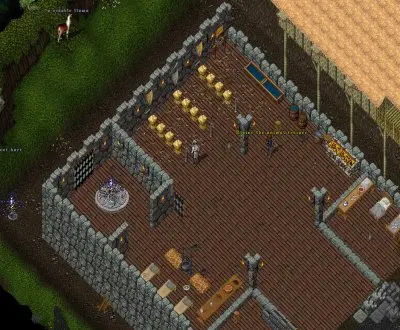
You can speak to the village elder in his hut to learn more about the problems plaguing his expedition. Shortly after setting up camp they encountered some humans that having been so long list in the wilds had learned how to commune with dangerous creatures and direct them to do their bidding. If you can defeat them he think he can teach your party how to successfully establish a bond with more pets.
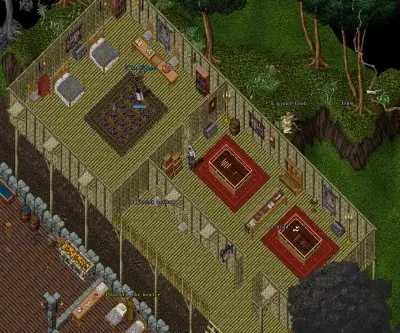
The first of the dangerous tamers, the beast tamer. Should he be threatened he will summon the Colossus, Obsidian Gargoyle, a Two Headed Behemoth and a Jungle Titan.
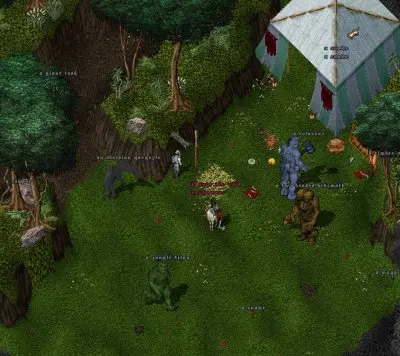
Next players will have to contend with the Reptile tamer, a strange humanoid with exceptional skills in making dangerous reptiles do his bidding. He will summon a Land Shark, the Ophidian Queen, A Wyvern Monatch and an Anaconda to defend him should he be attacked.
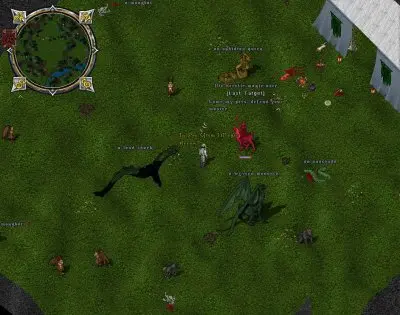
Very little is known about the final monster hidden deep in the jungle as no one has returned alive. There are rumors of a camp of knights hidden in the jungle who can provide assistance to the adventurers.
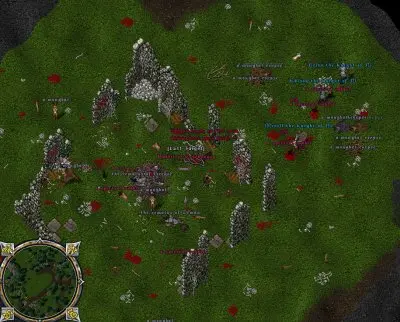
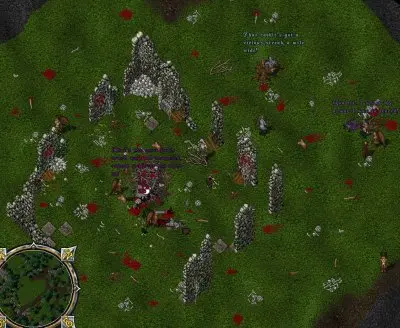
Should the players somehow manage the defeat these creatures they should return to the village elder. Once there make sure you use the scroll provided to you by the zookeeper to select the adventurers that helped you survive the horrors of this jungle.
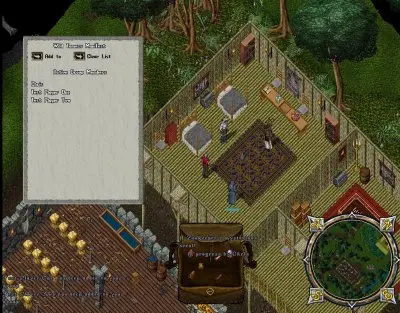
Once you have your party set, drag the scroll onto the Elder.
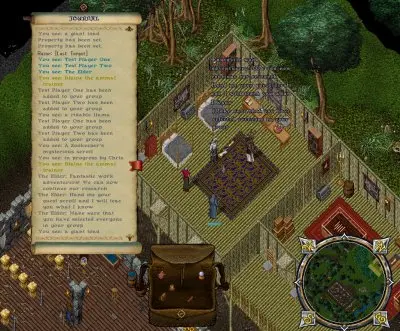
He will ask you if you are sure you are ready to learn about advanced pet bonding. Pay close attention to the amount of players he sees before you click ok.
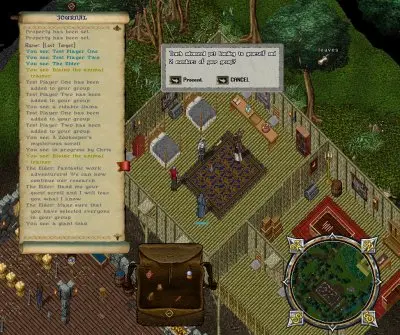
He will teach everyone in your party how to bond one additional pet.
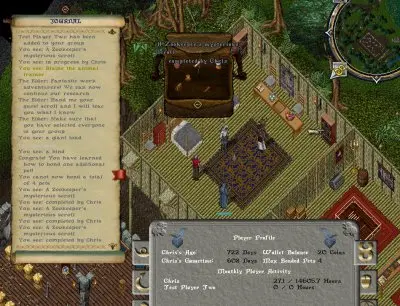
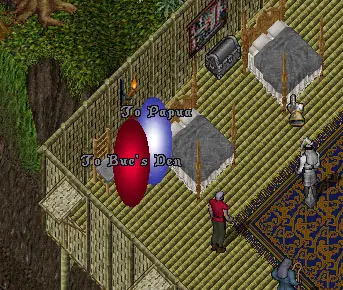
To leave this strange land choose from one of the provided gates.
Part 2: Question & Answer, Bonding Expansion FAQ
Q. How many times can you complete the quest to obtain more bonded pets?
A. You can complete it as many times as you like. There is no limited on the amount of bonded pets you can earn.
Q. How many players can learn how to bond an additional pet when finishing the quest.
A. The scroll owner can select a maximum of 9 players before turning in the scroll to the quest elder.
Q. How many players can participate in the event using the scroll.
A. Unlimited, however only the 9 players that the scroll owner selects can learn how to bond another pet.
Q. What if I lose the scroll during the event.
A. Once you use the scroll to begin the event it becomes blessed.
Q. Do players need to complete the Zookeepers quest to take part in the Event?
A. No. Similar to Ancient MIB's the Quest scroll will open a gate for 60 seconds allowing any players to take part. Players are however encouraged to work together to complete the zookeepers quest as you can tame, stable, and transfer the rare pets working to complete a single scroll.
Q. What if I lose the Zookeepers quest scroll?
A. The quest scroll is blessed and should be safe from loss. However if you lose it by non standard means it cannot be replaced. You need to bring it with you to the zookeeper each time you find another pet to turn in.
Q. Can I earn an ironman award for the Wild Tamer event?
A. Yes. The scroll owner at the completion of the event will be given information about how you did when attempting the ironman version of the event. Players will be rewarded with special ironman trophies should they defeat the event using only 2 characters. A detailed ironman guide will be posted later.
Q. Is there a rare spawn in the event area?
A. Yes. Although you will have to find it.
Q. Can I keep the gilded dragon as a pet?
A. Yes. However it is not quite as strong as a normal dragon.
Q. What if I die during the event?
A. A banker, healer, stable master, provisoner and variety dealer are provided should one of your party perish during the event.
Q. How long do we have to defeat the 3 bosses and return to the Elder?
A. Players will have 2 hours to complete the event. Various clocks placed around the event will show you how much time is left.
Q. Once I have more bonded pets, what if I lose one?
A. The pet summoning balls have been upgraded as well to allow for better pet management. You can read more about them here
Q. Is there any treasure to be found in the event?
A. Yes. Each boss is defending a personal stash of loot, and carries the key to that chest. The chests can also be unlocked by a lockpicker. Additional rare spawns may be found in the event as well along with special items dropped from the various monsters.
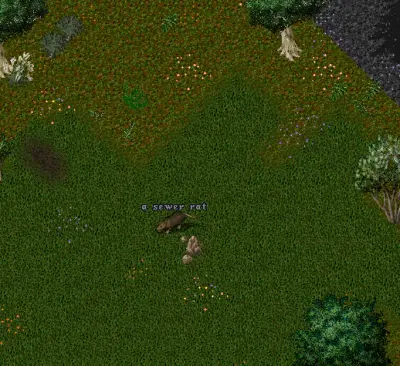
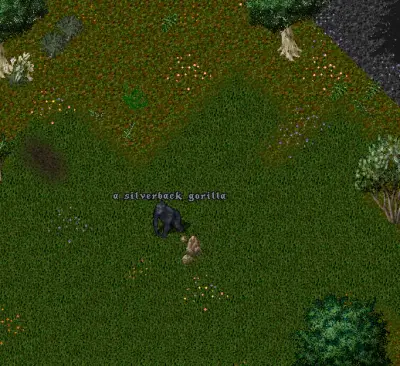
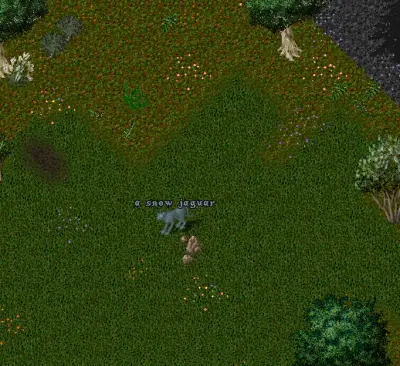
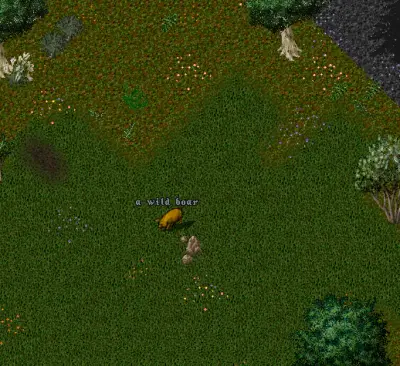
Part 3: Animals That You Have Been Tasked to Find by the Zoo Keeper
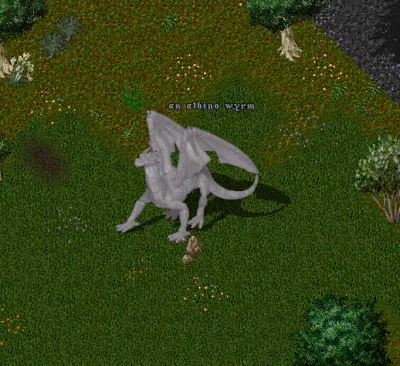
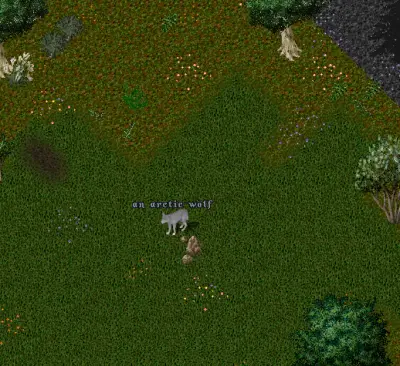
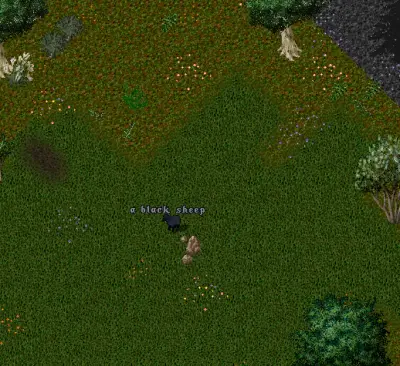
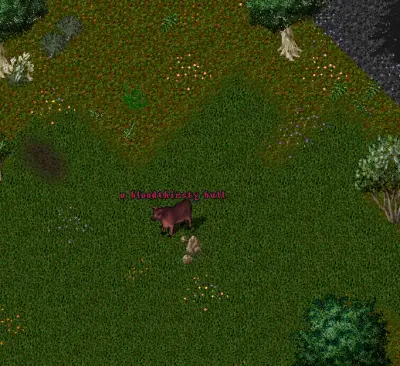
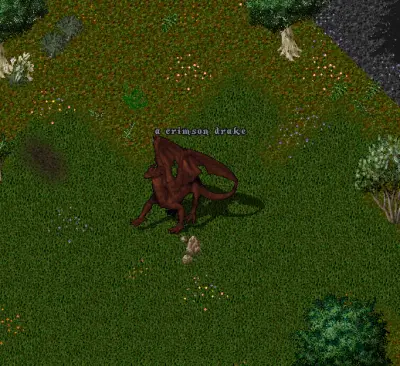
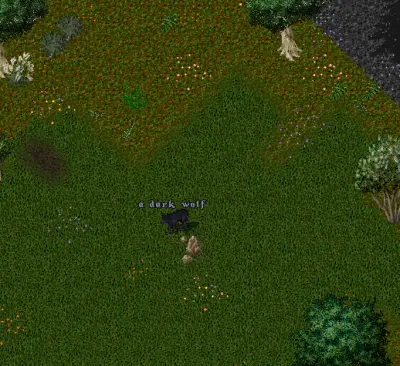
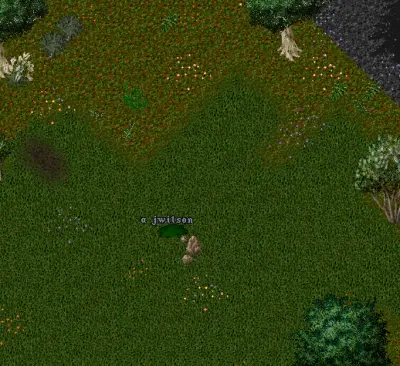
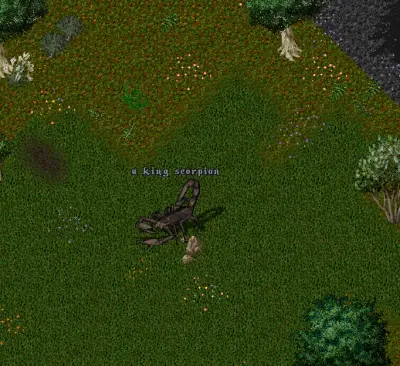
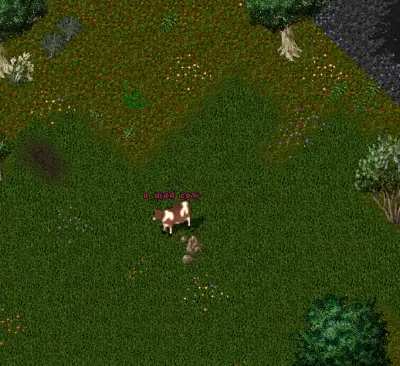
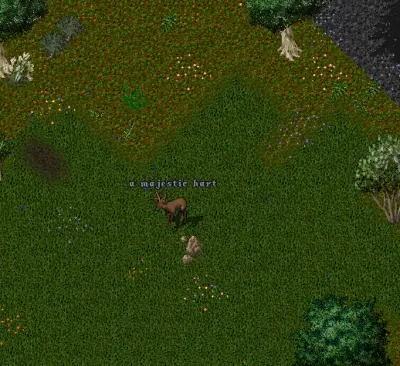
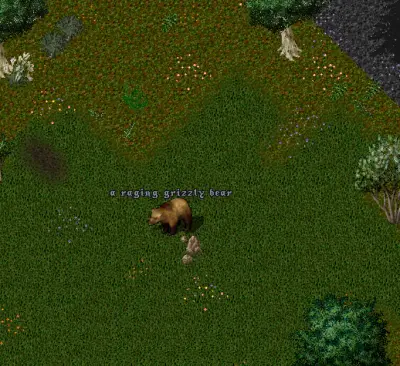
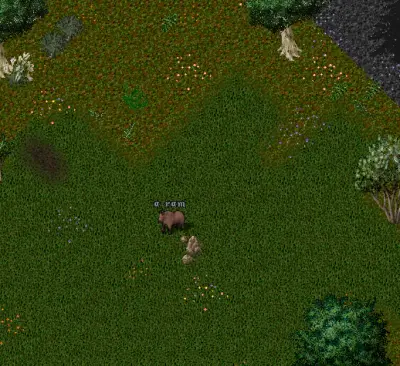
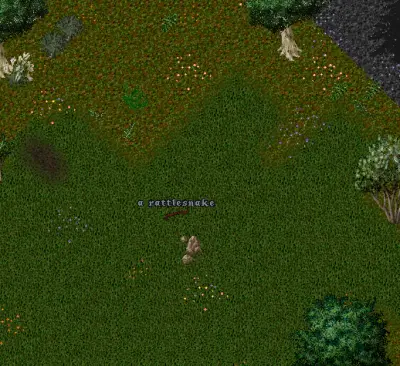
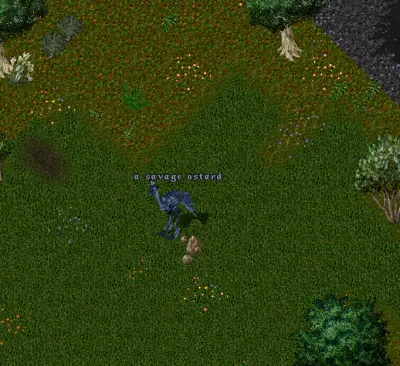
Part 4: Strategy for Completing the Quest
Dragons. Lots of dragons. Dragons are generally better than white wyrms because boss monsters take reduced damage from pet melee. Dragon firebreath, however, is not impacted by this damage reduction. You do have access to Stables from the taming area, so you can have extras in your stable to access.
Reagents. Lots of reagents. Maybe 200 of each, especially Greater Heal reagents. You will have access to your bank, so keep extras there. It is sometimes hard to access your pets or your comrades' pets directly, so veterinary can be difficult.
Bandages. Maybe 300 or so. Depending on your role, you may be able to stay safe and close to your pet, and veterinary is the best way to heal them in this case.
Enemies: Reptile Tamer (boss), Anaconda, Wyvern Monarch, Ophidian Queen, Land Shark
Strategy: Take out the poisoning enemies first (Anaconda, Wyvern Monarch), while one person tanks the boss. Then once the minor spawn is cleared, gang up on the boss. The boss only has that initial spawn, so once it's gone it is safe to team up on him. Try to draw the enemies to the southeast to stay away from the monsters in stage 2.
Enemies: Beast Tamer (boss), Colossus, Jungle Titan, Obsidian Gargoyle, Two-Headed Behemoth
Strategy: One person tanks the boss. Then once the minor spawn is cleared, gang up on the boss. The boss only has that initial spawn, so once it's gone, it is safe to team up on him. Try to draw the enemies to the southeast to stay away from the monsters in stage 3.
Enemies: Spectral Rabbit, Rabbit of Caerbannog
Strategy: Again, stay on the southeast side to avoid seeing other monsters too soon. Have one person occupy the boss while the rest focus on the spectral rabbits. The spectral rabbits spawn at specific health intervals of the boss, so keeping just one set of pets on him will ensure everyone has enough time to clear the lesser spawn at each interval. Discordance on the boss and the spectral rabbits is extremely helpful. When all spectral rabbits are dead, everyone can focus on the boss for a bit. Once he spawns more spectral rabbits, immediately go after them (with one person again keeping the boss busy).
Offensive spells cast on the bosses will cause them to teleport to you. They also teleport around when being hit, so they are hard to keep an active vet on. The person soloing the boss is the most likely person in need of an additional Greater Heal from the field, so keep an eye out for their pets.
If a spectral rabbit or two goes after the dragons tanking the boss, take them out quickly and ensure the dragons tanking the boss are kept healthy. This is the biggest threat during this stage.
Each boss has a chest key to a nearby chest. There is platinum in the chests, and it is otherwise standard treasure map fare. The chests are required to be looted for the Ironman prize, but not for the bonding slots. It may be wise to bring an alt that can Lockpick; that way, if you accidentally lose a key, you can still open the chests.
The mask of the wilds has a 1 in 3 chance of dropping (our calculation is based on the number of masks we have vs how many times we have completed it).
Statues have a chance to drop as well, from the boss monsters.
Bosses and mini-bosses all have a chance to drop peculiar meat, so be sure to carve all corpses.
There is a spawning rare painting.
The chests may contain a "Knight's Strongbox".