Champion Spawns: Difference between revisions
Create comprehensive Champion Spawns and The Harrower guide with images |
Update Champion Spawns without leading whitespace |
||
| Line 4: | Line 4: | ||
<div style="display: flex; gap: 12px; justify-content: center; flex-wrap: wrap; margin-top: 18px;"> | <div style="display: flex; gap: 12px; justify-content: center; flex-wrap: wrap; margin-top: 18px;"> | ||
<a href="#Altars" style="display: inline-flex; align-items: center; gap: 8px; padding: 8px 18px; background: rgba(212, 175, 55, 0.15); border: 1px solid rgba(212, 175, 55, 0.4); border-radius: 6px; color: #ffd700; font-family: 'Cinzel', serif; font-size: 0.92rem; text-decoration: none; font-weight: bold; transition: all 0.2s ease;"><span>🕯️</span> 1. Altar Mechanics</a> | |||
<a href="#Champions" style="display: inline-flex; align-items: center; gap: 8px; padding: 8px 18px; background: rgba(212, 175, 55, 0.15); border: 1px solid rgba(212, 175, 55, 0.4); border-radius: 6px; color: #ffd700; font-family: 'Cinzel', serif; font-size: 0.92rem; text-decoration: none; font-weight: bold; transition: all 0.2s ease;"><span>👹</span> 2. The Six Champions</a> | |||
<a href="#The_Harrower" style="display: inline-flex; align-items: center; gap: 8px; padding: 8px 18px; background: rgba(212, 175, 55, 0.15); border: 1px solid rgba(212, 175, 55, 0.4); border-radius: 6px; color: #ffd700; font-family: 'Cinzel', serif; font-size: 0.92rem; text-decoration: none; font-weight: bold; transition: all 0.2s ease;"><span>🐙</span> 3. The Harrower</a> | |||
<a href="#Rewards" style="display: inline-flex; align-items: center; gap: 8px; padding: 8px 18px; background: rgba(212, 175, 55, 0.15); border: 1px solid rgba(212, 175, 55, 0.4); border-radius: 6px; color: #ffd700; font-family: 'Cinzel', serif; font-size: 0.92rem; text-decoration: none; font-weight: bold; transition: all 0.2s ease;"><span>🏆</span> 4. Rewards & Titles</a> | |||
</div> | </div> | ||
</div> | </div> | ||
| Line 46: | Line 46: | ||
|- | |- | ||
| style="width: 30%; vertical-align: top; padding: 12px;" | | | style="width: 30%; vertical-align: top; padding: 12px;" | | ||
<html><img src="/wiki/images/champions/semidar_icon.png" alt="Semidar" style="width: 100%; max-width: 220px; border-radius: 4px; border: 1px solid rgba(212,175,55,0.4); display: block; margin-bottom: 8px;" /></html> | |||
<div style="text-align: center;"> | |||
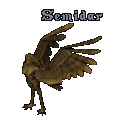
<html><img src="/wiki/images/champions/semidar.png" alt="Semidar Sprite" style="image-rendering: pixelated; vertical-align: middle;" /></html> | |||
<div style="font-family: 'Cinzel', serif; font-size: 1.2rem; color: #ffd700; font-weight: bold; margin-top: 4px;">Semidar</div> | |||
<div style="color: #d8caa7; font-size: 0.9rem; font-style: italic;">Queen of the Abyss</div> | |||
</div> | |||
| style="width: 70%; vertical-align: top; padding: 12px;" | | | style="width: 70%; vertical-align: top; padding: 12px;" | | ||
<b>Location:</b> Fire Dungeon (Felucca)<br> | |||
<b>Recommended Slayer:</b> Daemon / Exorcism (Super Slayer)<br> | |||
<b>Champion Skull:</b> <code>Red Skull of the Abyss</code><br> | |||
<b>Title Rewards:</b> <i>Foe of the Abyss • Assassin of the Abyss • Conqueror of the Abyss</i> | |||
<hr style="border: 0; border-top: 1px solid rgba(212,175,55,0.25); margin: 8px 0;"> | |||
<b>Spawn Levels:</b> | |||
* <b>Level 1:</b> Imp, Greater Mongbat | |||
* <b>Level 2:</b> Gargoyle, Harpy | |||
* <b>Level 3:</b> Fire Gargoyle, Stone Gargoyle | |||
* <b>Level 4:</b> Daemon, Succubus | |||
<hr style="border: 0; border-top: 1px solid rgba(212,175,55,0.25); margin: 8px 0;"> | |||
<b>Combat Strategy:</b> Semidar is a colossal demonic succubus. She reflects massive melee damage back at male combatants and can siphon health. Female characters do not trigger her life-reflection, making female warriors and tamers exceptionally effective against her. | |||
|} | |} | ||
| Line 71: | Line 71: | ||
|- | |- | ||
| style="width: 30%; vertical-align: top; padding: 12px;" | | | style="width: 30%; vertical-align: top; padding: 12px;" | | ||
<html><img src="/wiki/images/champions/Mephitis_Icon.png" alt="Mephitis" style="width: 100%; max-width: 220px; border-radius: 4px; border: 1px solid rgba(212,175,55,0.4); display: block; margin-bottom: 8px;" /></html> | |||
<div style="text-align: center;"> | |||
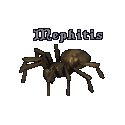
<html><img src="/wiki/images/champions/mephitis.png" alt="Mephitis Sprite" style="image-rendering: pixelated; vertical-align: middle;" /></html> | |||
<div style="font-family: 'Cinzel', serif; font-size: 1.2rem; color: #ffd700; font-weight: bold; margin-top: 4px;">Mephitis</div> | |||
<div style="color: #d8caa7; font-size: 0.9rem; font-style: italic;">The Broodmother</div> | |||
</div> | |||
| style="width: 70%; vertical-align: top; padding: 12px;" | | | style="width: 70%; vertical-align: top; padding: 12px;" | | ||
<b>Location:</b> Terathan Keep (Felucca)<br> | |||
<b>Recommended Slayer:</b> Arachnid / Arachnid Doom (Super Slayer)<br> | |||
<b>Champion Skull:</b> <code>Spider Skull of Arachnid</code><br> | |||
<b>Title Rewards:</b> <i>Bane of the Arachnid • Killer of the Arachnid • Victor of the Arachnid</i> | |||
<hr style="border: 0; border-top: 1px solid rgba(212,175,55,0.25); margin: 8px 0;"> | |||
<b>Spawn Levels:</b> | |||
* <b>Level 1:</b> Scorpion, Giant Spider | |||
* <b>Level 2:</b> Terathan Drone, Terathan Warrior | |||
* <b>Level 3:</b> Dread Spider, Terathan Matriarch | |||
* <b>Level 4:</b> Poison Elemental, Terathan Avenger | |||
<hr style="border: 0; border-top: 1px solid rgba(212,175,55,0.25); margin: 8px 0;"> | |||
<b>Combat Strategy:</b> Mephitis casts lethal web cocoons that completely immobilize targets, followed by virulent lethal poison bites. Keep Greater Cure potions and Arch Cure spells ready at all times. | |||
|} | |} | ||
| Line 96: | Line 96: | ||
|- | |- | ||
| style="width: 30%; vertical-align: top; padding: 12px;" | | | style="width: 30%; vertical-align: top; padding: 12px;" | | ||
<html><img src="/wiki/images/champions/Rikktor_Icon.png" alt="Rikktor" style="width: 100%; max-width: 220px; border-radius: 4px; border: 1px solid rgba(212,175,55,0.4); display: block; margin-bottom: 8px;" /></html> | |||
<div style="text-align: center;"> | |||
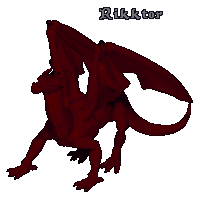
<html><img src="/wiki/images/champions/rikktor.png" alt="Rikktor Sprite" style="image-rendering: pixelated; vertical-align: middle;" /></html> | |||
<div style="font-family: 'Cinzel', serif; font-size: 1.2rem; color: #ffd700; font-weight: bold; margin-top: 4px;">Rikktor</div> | |||
<div style="color: #d8caa7; font-size: 0.9rem; font-style: italic;">The Dragon Lord</div> | |||
</div> | |||
| style="width: 70%; vertical-align: top; padding: 12px;" | | | style="width: 70%; vertical-align: top; padding: 12px;" | | ||
<b>Location:</b> Dungeon Destard (Felucca)<br> | |||
<b>Recommended Slayer:</b> Reptile / Reptilian Death / Dragon Slayer<br> | |||
<b>Champion Skull:</b> <code>Dragon Skull of Cold Blood</code><br> | |||
<b>Title Rewards:</b> <i>Blight of the Cold Blood • Slayer of the Cold Blood • Destroyer of the Cold Blood</i> | |||
<hr style="border: 0; border-top: 1px solid rgba(212,175,55,0.25); margin: 8px 0;"> | |||
<b>Spawn Levels:</b> | |||
* <b>Level 1:</b> Lizardman, Snake | |||
* <b>Level 2:</b> Lava Lizard, Ophidian Warrior | |||
* <b>Level 3:</b> Drake, Ophidian Matriarch | |||
* <b>Level 4:</b> Dragon, Ophidian Knight | |||
<hr style="border: 0; border-top: 1px solid rgba(212,175,55,0.25); margin: 8px 0;"> | |||
<b>Combat Strategy:</b> Rikktor possesses immense physical strength and casts a catastrophic <b>Earthquake</b> shockwave that damages all surrounding grounded players and pets. High Magic Resist, ranged attacks, and cross-healing are essential. | |||
|} | |} | ||
| Line 121: | Line 121: | ||
|- | |- | ||
| style="width: 30%; vertical-align: top; padding: 12px;" | | | style="width: 30%; vertical-align: top; padding: 12px;" | | ||
<html><img src="/wiki/images/champions/LordOaks_Icon.png" alt="Lord Oaks" style="width: 100%; max-width: 220px; border-radius: 4px; border: 1px solid rgba(212,175,55,0.4); display: block; margin-bottom: 8px;" /></html> | |||
<div style="text-align: center;"> | |||
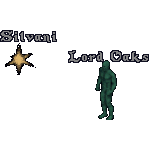
<html><img src="/wiki/images/champions/lordoaks.png" alt="Lord Oaks Sprite" style="image-rendering: pixelated; vertical-align: middle; margin-right: 6px;" /><img src="/wiki/images/champions/silvani.png" alt="Silvani Sprite" style="image-rendering: pixelated; vertical-align: middle;" /></html> | |||
<div style="font-family: 'Cinzel', serif; font-size: 1.2rem; color: #ffd700; font-weight: bold; margin-top: 4px;">Lord Oaks & Silvani</div> | |||
<div style="color: #d8caa7; font-size: 0.9rem; font-style: italic;">Guardians of the Glade</div> | |||
</div> | |||
| style="width: 70%; vertical-align: top; padding: 12px;" | | | style="width: 70%; vertical-align: top; padding: 12px;" | | ||
<b>Location:</b> The Lost Lands (T2A Forest / Glade)<br> | |||
<b>Recommended Slayer:</b> Fey<br> | |||
<b>Champion Skull:</b> <code>Elven Skull of the Forest</code><br> | |||
<b>Title Rewards:</b> <i>Enemy of the Forest • Slayer of the Forest • Lord of the Forest</i> | |||
<hr style="border: 0; border-top: 1px solid rgba(212,175,55,0.25); margin: 8px 0;"> | |||
<b>Spawn Levels:</b> | |||
* <b>Level 1:</b> Pixie, Shadow Wisp | |||
* <b>Level 2:</b> Ki-Rin, Wisp | |||
* <b>Level 3:</b> Centaur, Unicorn | |||
* <b>Level 4:</b> Ethereal Warrior, Serpentine Dragon | |||
<hr style="border: 0; border-top: 1px solid rgba(212,175,55,0.25); margin: 8px 0;"> | |||
<b>Combat Strategy:</b> Lord Oaks is invulnerable while his consort, <b>Silvani</b>, draws breath! Slaying Silvani must be prioritized before Lord Oaks can take damage. Note: Slaying noble creatures in this spawn results in substantial Karma loss! | |||
|} | |} | ||
| Line 146: | Line 146: | ||
|- | |- | ||
| style="width: 30%; vertical-align: top; padding: 12px;" | | | style="width: 30%; vertical-align: top; padding: 12px;" | | ||
<html><img src="/wiki/images/champions/Neira_Icon.png" alt="Neira" style="width: 100%; max-width: 220px; border-radius: 4px; border: 1px solid rgba(212,175,55,0.4); display: block; margin-bottom: 8px;" /></html> | |||
<div style="text-align: center;"> | |||
<html><img src="/wiki/images/champions/neira.png" alt="Neira Sprite" style="image-rendering: pixelated; vertical-align: middle;" /></html> | |||
<div style="font-family: 'Cinzel', serif; font-size: 1.2rem; color: #ffd700; font-weight: bold; margin-top: 4px;">Neira the Necromancer</div> | |||
<div style="color: #d8caa7; font-size: 0.9rem; font-style: italic;">The Pale Rider</div> | |||
</div> | |||
| style="width: 70%; vertical-align: top; padding: 12px;" | | | style="width: 70%; vertical-align: top; padding: 12px;" | | ||
<b>Location:</b> Dungeon Deceit (Felucca)<br> | |||
<b>Recommended Slayer:</b> Undead / Silver (Super Slayer)<br> | |||
<b>Champion Skull:</b> <code>Bone Skull of Unholy Terror</code><br> | |||
<b>Title Rewards:</b> <i>Scourge of the Unholy • Punisher of the Unholy • Vanquisher of the Unholy</i> | |||
<hr style="border: 0; border-top: 1px solid rgba(212,175,55,0.25); margin: 8px 0;"> | |||
<b>Spawn Levels:</b> | |||
* <b>Level 1:</b> Bogle, Ghoul, Shade, Skeleton, Spectre, Zombie | |||
* <b>Level 2:</b> Bone Magi, Bone Knight, Mummy, Skeletal Mage | |||
* <b>Level 3:</b> Bone Knight, Lich, Skeletal Steed | |||
* <b>Level 4:</b> Lich Lord, Rotting Corpse | |||
<hr style="border: 0; border-top: 1px solid rgba(212,175,55,0.25); margin: 8px 0;"> | |||
<b>Combat Strategy:</b> Neira mounts a skeletal charger, flings deadly unholy bones that deal heavy physical and poison damage, and summons continuous undead minion waves. Undead slayers are vital. | |||
|} | |} | ||
| Line 171: | Line 171: | ||
|- | |- | ||
| style="width: 30%; vertical-align: top; padding: 12px;" | | | style="width: 30%; vertical-align: top; padding: 12px;" | | ||
<html><img src="/wiki/images/champions/Barracoon_Icon.png" alt="Barracoon" style="width: 100%; max-width: 220px; border-radius: 4px; border: 1px solid rgba(212,175,55,0.4); display: block; margin-bottom: 8px;" /></html> | |||
<div style="text-align: center;"> | |||
<html><img src="/wiki/images/champions/barracoon.png" alt="Barracoon Sprite" style="image-rendering: pixelated; vertical-align: middle;" /></html> | |||
<div style="font-family: 'Cinzel', serif; font-size: 1.2rem; color: #ffd700; font-weight: bold; margin-top: 4px;">Barracoon the Piper</div> | |||
<div style="color: #d8caa7; font-size: 0.9rem; font-style: italic;">The Rat King</div> | |||
</div> | |||
| style="width: 70%; vertical-align: top; padding: 12px;" | | | style="width: 70%; vertical-align: top; padding: 12px;" | | ||
<b>Location:</b> Dungeon Despise (Felucca)<br> | |||
<b>Recommended Slayer:</b> Repond / Vermin (Super Slayer)<br> | |||
<b>Champion Skull:</b> <code>Rat Skull of Vermin</code><br> | |||
<b>Title Rewards:</b> <i>Adversary of the Vermin • Subduer of the Vermin • Overthrower of the Vermin</i> | |||
<hr style="border: 0; border-top: 1px solid rgba(212,175,55,0.25); margin: 8px 0;"> | |||
<b>Spawn Levels:</b> | |||
* <b>Level 1:</b> Giant Rat, Sewerrat | |||
* <b>Level 2:</b> Ratman, Ratman Archer | |||
* <b>Level 3:</b> Ratman Mage, Dire Wolf | |||
* <b>Level 4:</b> Silver Serpent, Hell Hound | |||
<hr style="border: 0; border-top: 1px solid rgba(212,175,55,0.25); margin: 8px 0;"> | |||
<b>Combat Strategy:</b> Barracoon teleports frantically across the room and polymorphs nearby attackers into giant rats (temporarily unequipping weapons and items!). Trapping him against walls or obstacles is the classic strategy. | |||
|} | |} | ||
| Line 198: | Line 198: | ||
<div style="text-align: center; margin-bottom: 25px; background: rgba(14, 11, 7, 0.85); border: 1px solid rgba(212, 175, 55, 0.35); border-radius: 8px; padding: 16px;"> | <div style="text-align: center; margin-bottom: 25px; background: rgba(14, 11, 7, 0.85); border: 1px solid rgba(212, 175, 55, 0.35); border-radius: 8px; padding: 16px;"> | ||
<html><img src="/wiki/images/champions/Harrower_Full.png" alt="The Harrower" style="max-width: 100%; height: auto; border-radius: 6px; border: 1px solid rgba(212, 175, 55, 0.4); box-shadow: 0 4px 15px rgba(0,0,0,0.8);" /></html> | |||
<div style="font-family: 'Cinzel', serif; font-size: 1.3rem; color: #ffd700; margin-top: 10px; font-weight: bold;">The True Harrower</div> | |||
<div style="font-family: 'Cardo', serif; font-size: 0.95rem; color: #d8caa7; font-style: italic;">The Primordial Scourge of Sosaria</div> | |||
</div> | </div> | ||
| Line 213: | Line 213: | ||
<div style="text-align: center; margin: 15px 0;"> | <div style="text-align: center; margin: 15px 0;"> | ||
<html><img src="/wiki/images/champions/Champion_Skulls_Full.png" alt="The Six Champion Skulls" style="max-width: 100%; height: auto; border-radius: 6px; border: 1px solid rgba(212, 175, 55, 0.4);" /></html> | |||
</div> | </div> | ||
=== The Star Room Ritual === | === The Star Room Ritual === | ||
<div style="display: flex; gap: 20px; align-items: center; flex-wrap: wrap; margin-bottom: 20px;"> | <div style="display: flex; gap: 20px; align-items: center; flex-wrap: wrap; margin-bottom: 20px;"> | ||
<div style="flex: 1; min-width: 260px;"> | |||
<html><img src="/wiki/images/champions/StarRoom.jpg" alt="The Star Room" style="width: 100%; border-radius: 6px; border: 1px solid rgba(212, 175, 55, 0.4); box-shadow: 0 4px 15px rgba(0,0,0,0.8);" /></html> | |||
<div style="text-align: center; font-size: 0.85rem; color: #d8caa7; font-style: italic; margin-top: 4px;">The Ancient Star Room Altar</div> | |||
</div> | |||
<div style="flex: 2; min-width: 300px;"> | |||
To summon the Harrower, all six Champion Skulls must be gathered and brought to the <b>Star Room</b> (accessible via hidden teleport pads). | |||
<br><br> | |||
Placing the six skulls upon their matching pillars triggers an ominous world-wide earthquake accompanied by a server broadcast: | |||
<div style="background: rgba(0,0,0,0.6); border-left: 3px solid #ff4444; padding: 10px; margin: 10px 0; font-family: 'Cinzel', serif; color: #ffd700; font-style: italic;"> | |||
"The ground trembles beneath your feet as the seal is shattered... The Harrower has entered Britannia!" | |||
</div> | |||
The Harrower spawns at a random dungeon level across Felucca! | |||
</div> | |||
</div> | </div> | ||
| Line 237: | Line 237: | ||
|- | |- | ||
| style="width: 35%; text-align: center; padding: 15px; vertical-align: top;" | | | style="width: 35%; text-align: center; padding: 15px; vertical-align: top;" | | ||
<html><img src="/wiki/images/champions/trueharrower.png" alt="True Harrower" style="image-rendering: pixelated; margin-right: 10px;" /><img src="/wiki/images/champions/tentaclesharrower.png" alt="Tentacle" style="image-rendering: pixelated;" /></html> | |||
<div style="font-family: 'Cinzel', serif; font-size: 1.1rem; color: #ffd700; font-weight: bold; margin-top: 8px;">The True Harrower & Tentacles</div> | |||
<div style="color: #d8caa7; font-size: 0.88rem; margin-top: 4px;">HP: 100,000+ • Armor: 60<br>Effective Slayer: Exorcism (Super)<br>Dropped Slayer: Fey</div> | |||
| style="width: 65%; padding: 15px; vertical-align: top;" | | | style="width: 65%; padding: 15px; vertical-align: top;" | | ||
* <b>Phase 1 (The Cloaked Harrower):</b> Appears as an elusive cloaked specter. Dealing enough damage shatters the illusion and forces the True Harrower to emerge. | |||
* <b>Phase 2 (The True Harrower):</b> The massive entity unleashes cataclysmic spells, teleports targets, and summons virulent <b>Tentacles of the Harrower</b>. | |||
* <b>The Tentacle Threat:</b> Tentacles drain player health, inflict heavy area-of-effect damage, and heal the Harrower. Raid groups must immediately coordinate to eliminate spawned tentacles before refocusing the Harrower! | |||
|} | |} | ||
Revision as of 14:04, 8 September 2026
<a href="#Altars" style="display: inline-flex; align-items: center; gap: 8px; padding: 8px 18px; background: rgba(212, 175, 55, 0.15); border: 1px solid rgba(212, 175, 55, 0.4); border-radius: 6px; color: #ffd700; font-family: 'Cinzel', serif; font-size: 0.92rem; text-decoration: none; font-weight: bold; transition: all 0.2s ease;">🕯️ 1. Altar Mechanics</a> <a href="#Champions" style="display: inline-flex; align-items: center; gap: 8px; padding: 8px 18px; background: rgba(212, 175, 55, 0.15); border: 1px solid rgba(212, 175, 55, 0.4); border-radius: 6px; color: #ffd700; font-family: 'Cinzel', serif; font-size: 0.92rem; text-decoration: none; font-weight: bold; transition: all 0.2s ease;">👹 2. The Six Champions</a> <a href="#The_Harrower" style="display: inline-flex; align-items: center; gap: 8px; padding: 8px 18px; background: rgba(212, 175, 55, 0.15); border: 1px solid rgba(212, 175, 55, 0.4); border-radius: 6px; color: #ffd700; font-family: 'Cinzel', serif; font-size: 0.92rem; text-decoration: none; font-weight: bold; transition: all 0.2s ease;">🐙 3. The Harrower</a> <a href="#Rewards" style="display: inline-flex; align-items: center; gap: 8px; padding: 8px 18px; background: rgba(212, 175, 55, 0.15); border: 1px solid rgba(212, 175, 55, 0.4); border-radius: 6px; color: #ffd700; font-family: 'Cinzel', serif; font-size: 0.92rem; text-decoration: none; font-weight: bold; transition: all 0.2s ease;">🏆 4. Rewards & Titles</a>
1. Champion Spawn Mechanics & Altars
Champion Spawns are tiered, group-oriented combat encounters located in the depths of Felucca dungeons and the Lost Lands. Adventurers must battle through waves of escalating monsters to summon the reigning Champion Boss. Overcoming all six distinct Champions yields the sacred Champion Skulls, required to awaken the ultimate horror: The True Harrower.
The Altar & Candle Progression System
Each Champion Spawn is anchored to a massive stone altar adorned with mystical skull candles:
- White Candles (Progression / Slices): White candles ignite sequentially as monsters are slain in the immediate radius of the altar. They indicate progress toward lighting the next Red Candle.
- Red Candles (Levels 1 to 4): A total of 16 Red Candles encircle the central pentagram, divided into 4 tiers (4 red candles per level):
- Level 1 (Candles 1–4): Swarms of entry-level minions (Mongbats, Rats, Ghouls, Imps, Snakes).
- Level 2 (Candles 5–8): Mid-tier monstrous shock troops (Gargoyles, Harpies, Ratman Archers, Bone Knights).
- Level 3 (Candles 9–12): Formidable beasts, casters, and giants (Dread Spiders, Liches, Drakes, Fire Gargoyles).
- Level 4 (Candles 13–16): High-tier horrors and elite predators (Daemons, Succubi, Dragons, Rotting Corpses).
- The Boss Awakening: When the 16th red candle is lit, all remaining spawn vanishes, and the Champion materializes directly upon the altar!
Candle Decay & Spawn Reset
- Time Pressure: A timer runs for each red candle slice. If players do not maintain an adequate kill pace, the spawn resets backward, extinguishing red candles.
- The Virtue of Valor (Knighting the Altar): Avatars who have progressed in the Virtue of Valor can double-click their Valor virtue ankh and target an active champion altar to instantly advance the spawn by several red candles.
---
2. The Six Champion Spawns
Britannia features six distinct Champion Spawns, each themed around a monstrous ecosystem, with unique monster tiers, slayer affinities, and signature bosses:
Abyss Champion Spawn (Fire Dungeon)
|
Semidar
Queen of the Abyss
|
Location: Fire Dungeon (Felucca) Spawn Levels:
Combat Strategy: Semidar is a colossal demonic succubus. She reflects massive melee damage back at male combatants and can siphon health. Female characters do not trigger her life-reflection, making female warriors and tamers exceptionally effective against her. |

Arachnid Champion Spawn (Terathan Keep)
|
Mephitis
The Broodmother
|
Location: Terathan Keep (Felucca) Spawn Levels:
Combat Strategy: Mephitis casts lethal web cocoons that completely immobilize targets, followed by virulent lethal poison bites. Keep Greater Cure potions and Arch Cure spells ready at all times. |

Cold Blood Champion Spawn (Destard)
|
Rikktor
The Dragon Lord
|
Location: Dungeon Destard (Felucca) Spawn Levels:
Combat Strategy: Rikktor possesses immense physical strength and casts a catastrophic Earthquake shockwave that damages all surrounding grounded players and pets. High Magic Resist, ranged attacks, and cross-healing are essential. |

Forest Lord Champion Spawn (The Lost Lands)
|
Lord Oaks & Silvani
Guardians of the Glade
|
Location: The Lost Lands (T2A Forest / Glade) Spawn Levels:
Combat Strategy: Lord Oaks is invulnerable while his consort, Silvani, draws breath! Slaying Silvani must be prioritized before Lord Oaks can take damage. Note: Slaying noble creatures in this spawn results in substantial Karma loss! |


Unholy Terror Champion Spawn (Deceit)
|
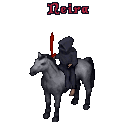
Neira the Necromancer
The Pale Rider
|
Location: Dungeon Deceit (Felucca) Spawn Levels:
Combat Strategy: Neira mounts a skeletal charger, flings deadly unholy bones that deal heavy physical and poison damage, and summons continuous undead minion waves. Undead slayers are vital. |

Vermin Horde Champion Spawn (Despise)
|
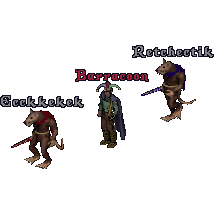
Barracoon the Piper
The Rat King
|
Location: Dungeon Despise (Felucca) Spawn Levels:
Combat Strategy: Barracoon teleports frantically across the room and polymorphs nearby attackers into giant rats (temporarily unequipping weapons and items!). Trapping him against walls or obstacles is the classic strategy. |

---
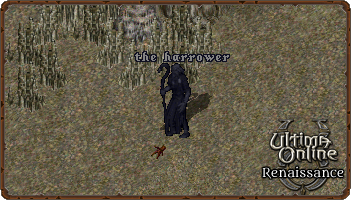
3. The Harrower (The Super Champion)
The Six Champion Skulls
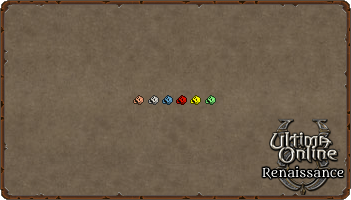
Defeating each Champion Boss rewards an ancient Champion Skull:
Red Skull of the Abyss(Semidar)Spider Skull of Arachnid(Mephitis)Dragon Skull of Cold Blood(Rikktor)Elven Skull of the Forest(Lord Oaks)Bone Skull of Unholy Terror(Neira)Rat Skull of Vermin(Barracoon)
The Star Room Ritual
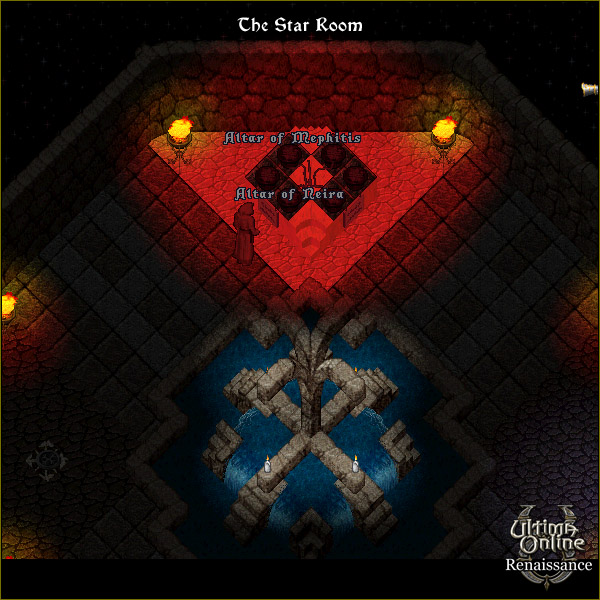
To summon the Harrower, all six Champion Skulls must be gathered and brought to the Star Room (accessible via hidden teleport pads).
Placing the six skulls upon their matching pillars triggers an ominous world-wide earthquake accompanied by a server broadcast:
"The ground trembles beneath your feet as the seal is shattered... The Harrower has entered Britannia!"
The Harrower spawns at a random dungeon level across Felucca!
Phase 1 & Phase 2: The True Harrower & Tentacles
|
The True Harrower & Tentacles
HP: 100,000+ • Armor: 60
Effective Slayer: Exorcism (Super) Dropped Slayer: Fey |
|


---
4. Champion & Harrower Rewards
Overcoming Champion Spawns and the Harrower provides some of the most sought-after treasures in Ultima Online:
| Reward | Source | Description & Utility |
|---|---|---|
| Stat Cap Scrolls (+5 to +25) | The True Harrower | Blessed scrolls that permanently increase your character's total statistical cap (from 225 up to 250!). Highly coveted for fine-tuning ultimate character builds. |
| Monster Statuettes | Champions & Harrower | Rare collectible interactive monster statuettes that produce authentic creature sound effects when double-clicked in a player home. |
| Platinum Coins | Champions & Harrower | Awarded directly into contributing players' backpacks. Can be redeemed at the Renaissance Platinum Vendor for blessed robes, dyes, and rare housing decor. |
| Massive Gold Explosions | Champions & Harrower | Upon a Champion or Harrower's death, tens of thousands of gold coins burst across the altar floor for participants to gather. |
| Hero Titles | Champion Altars | Slaying monsters and advancing champion spawns awards progress toward permanent 3-tiered Hero Titles displayed upon your character's paperdoll. |